
Set up MockFlow Bridge
Install MockFlow Bridge, start it in a terminal and pair your board, so Mida generates with Claude Code, Codex or another AI agent on your computer.
Setting up MockFlow Bridge takes a few minutes the first time: you install it, start it in a terminal window and pair your board with the code it shows. After that, starting Bridge is one command. For what Bridge does, see What is MockFlow Bridge.
Before you start
You need two things on your computer:
Node.js 18 or newer. Bridge runs on Node.js. Install it from nodejs.org, then check the version in a terminal (Terminal on macOS, Command Prompt on Windows):
node --versionAn AI agent, signed in. Install the one you use and sign in once:
Agent | Install | Sign in |
|---|---|---|
Claude Code |
|
|
Codex |
|
|
opencode | See opencode.ai |
|
If you do not use any of these, BridgeAI, the agent built into Bridge, works with an API key from OpenRouter, Azure OpenAI or Amazon Bedrock instead.
Bridge is available on every plan. On Basic, it runs with Claude Code on one board at a time. Plus and Max include Bridge Pro, with every agent and several boards at once. See MockFlow pricing.
Install and start MockFlow Bridge
Install Bridge once, in a terminal window:
npm i -g @mockflow/mockflow-bridgeThen start it:
mockflow-bridgeLeave the terminal window open. Bridge keeps running, shows the agent it found and prints a six digit pairing code. If you close the window, the connection stops.
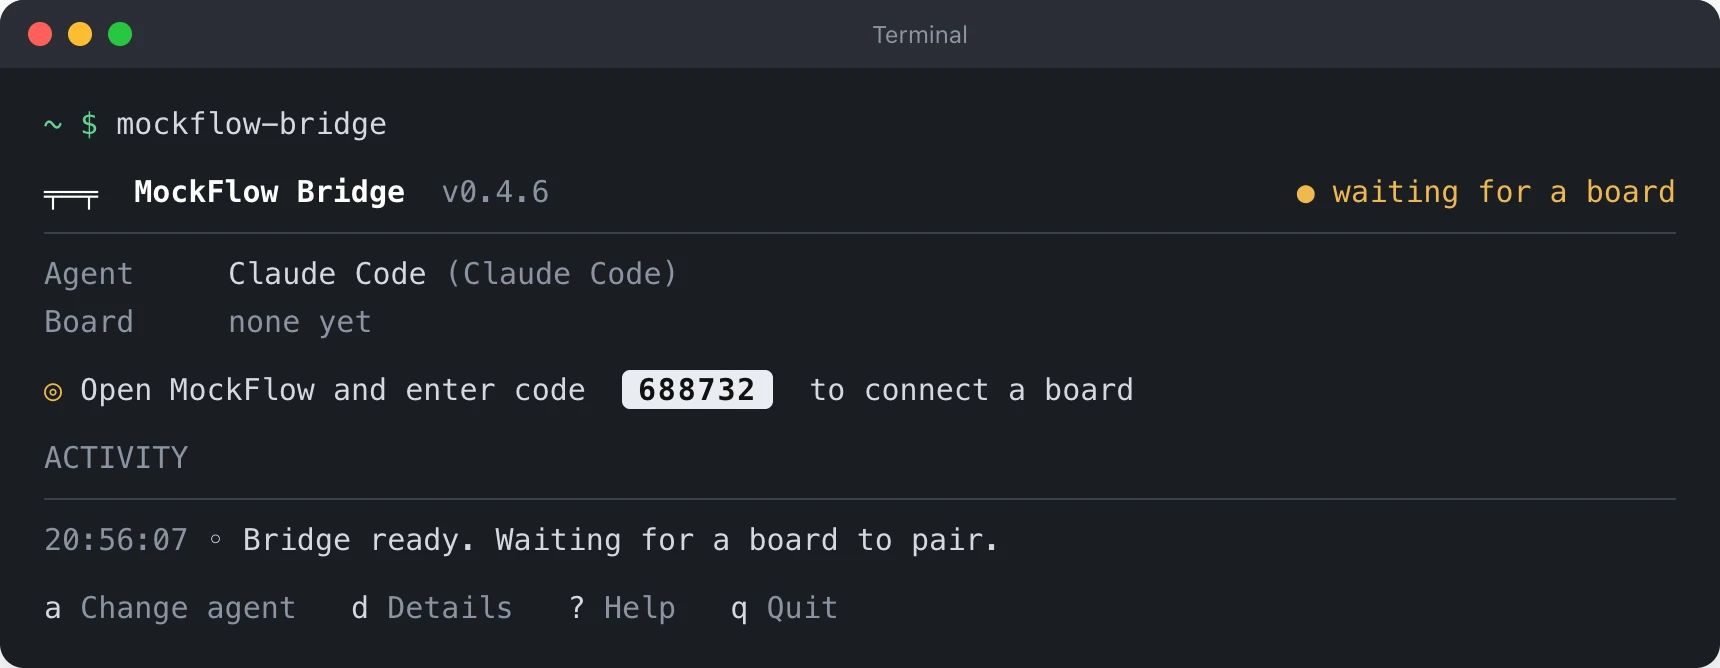
If more than one agent is installed, Bridge asks which one to use the first time and remembers your choice.
Pair your board with Bridge
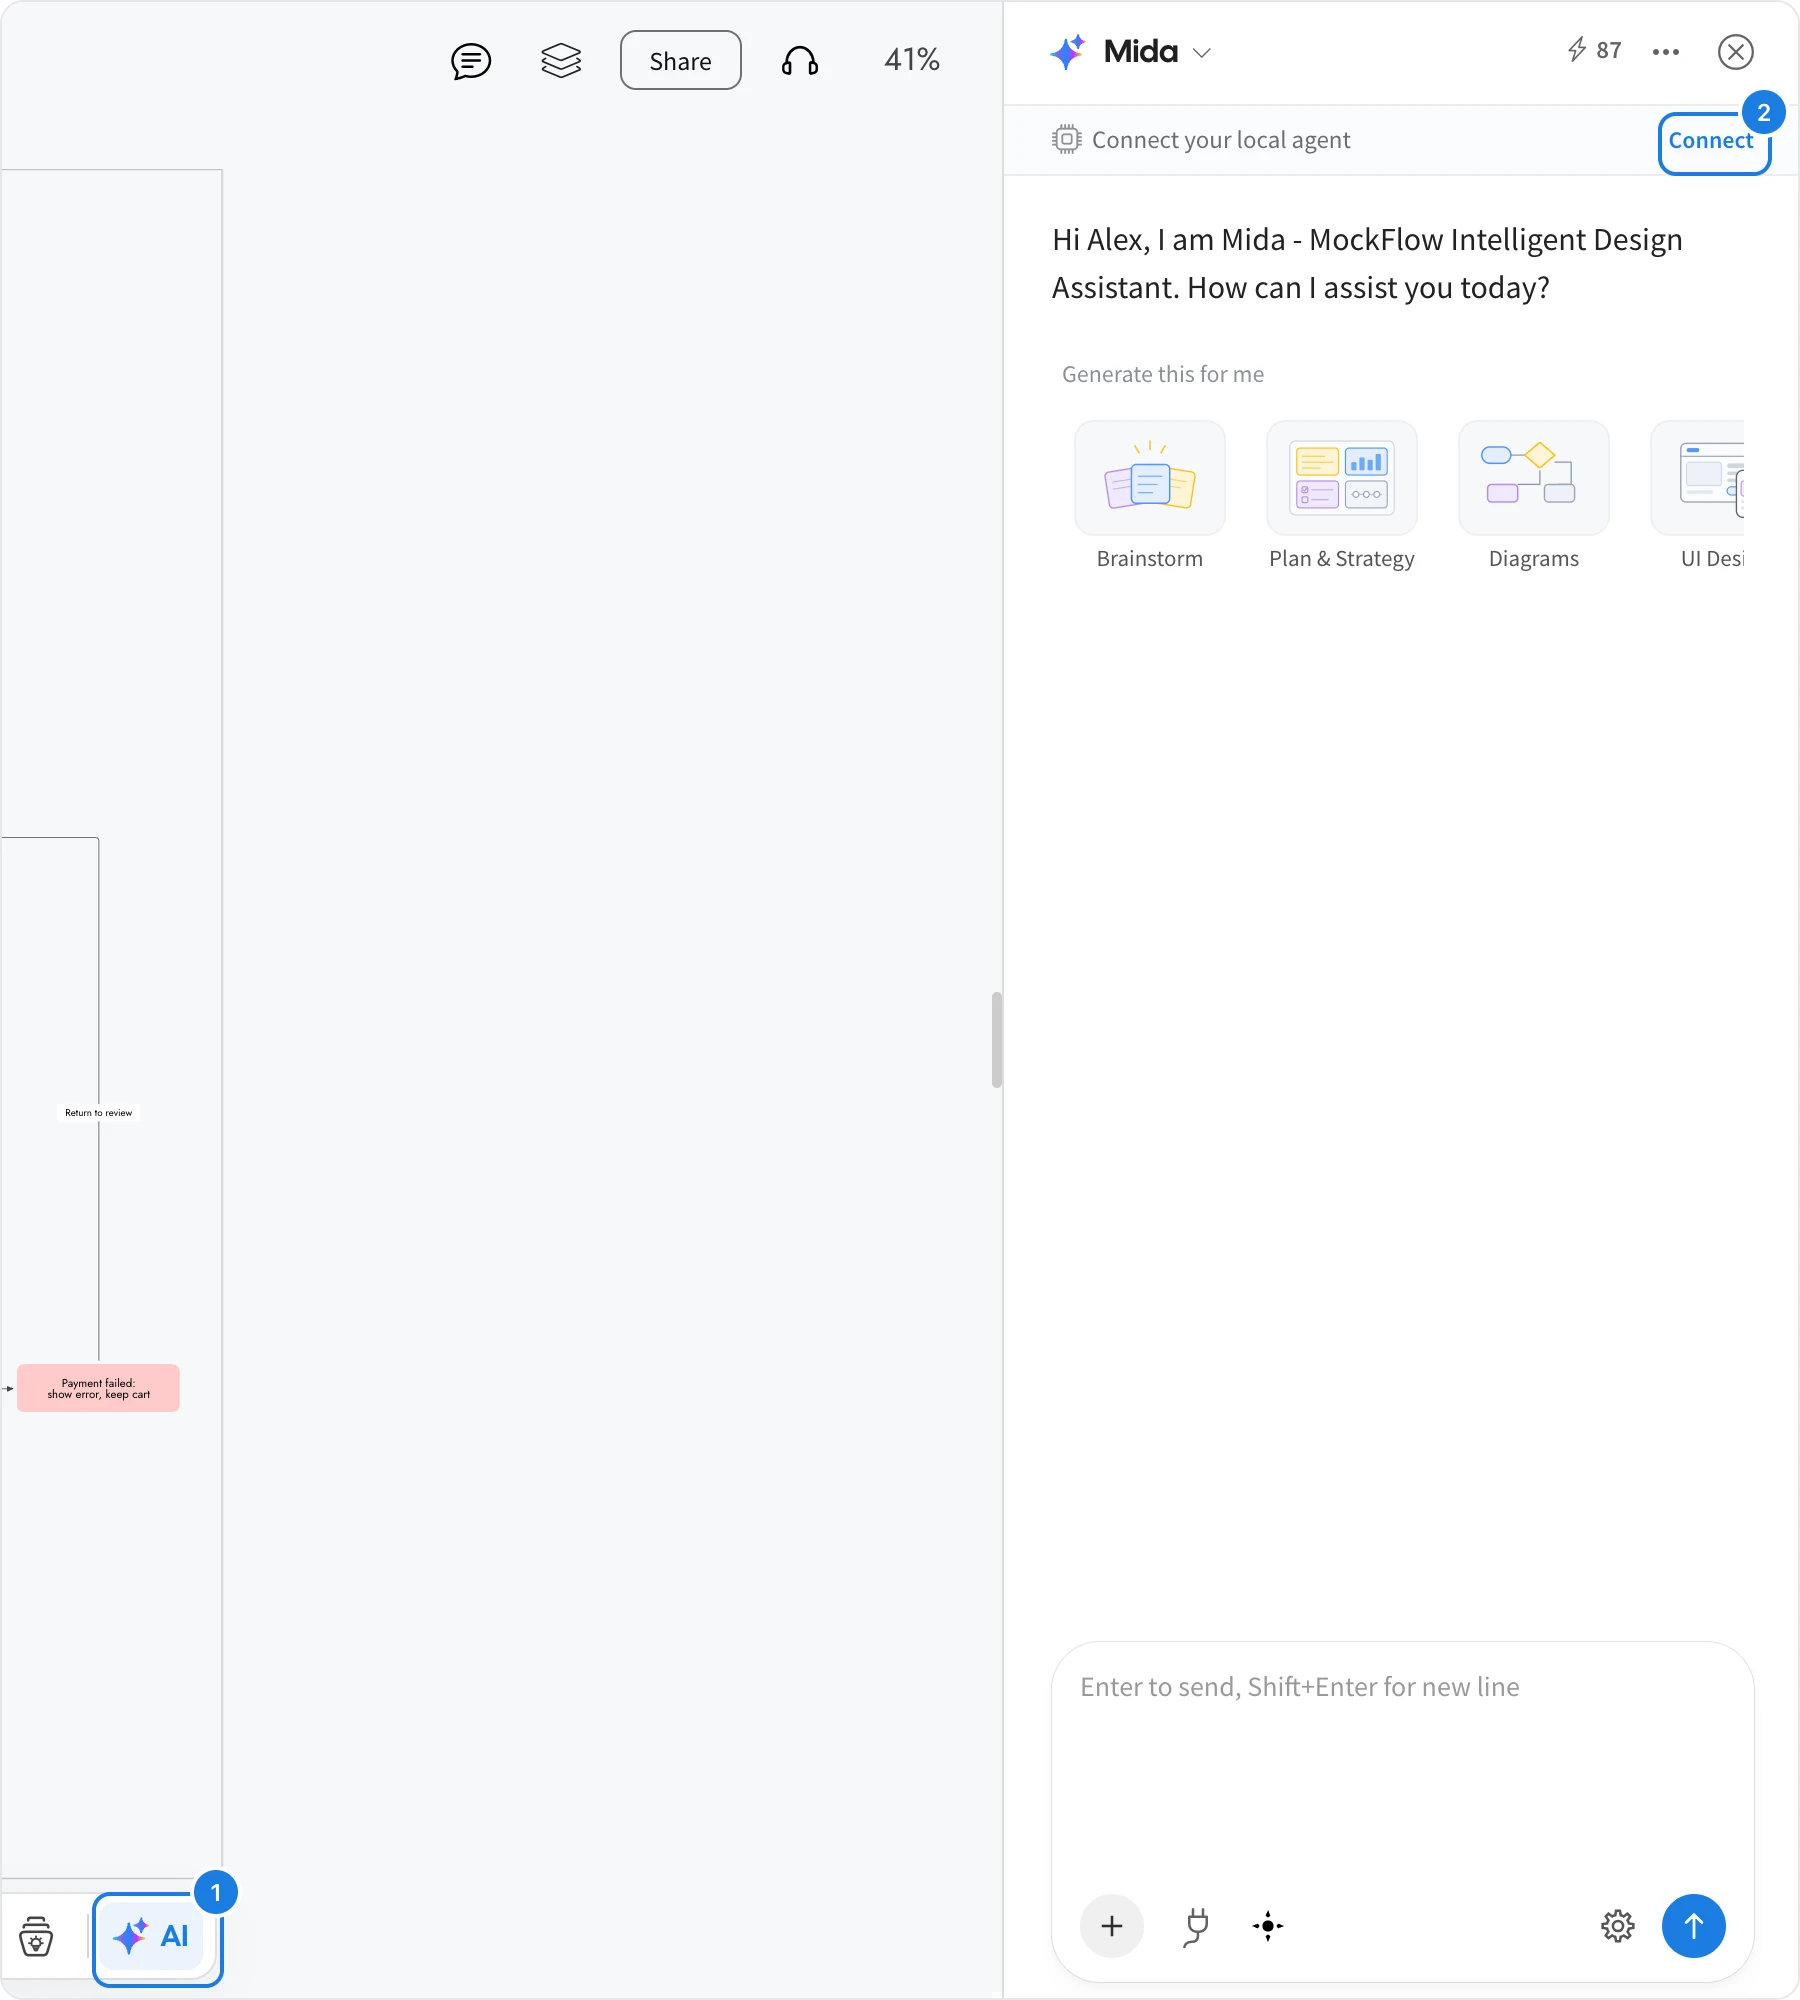
Open your board in MockFlow and click AI (1) in the tool bar at the bottom to open Mida.
On the Connect your local agent strip at the top of Mida, click Connect (2). The Connect a local agent dialog opens.
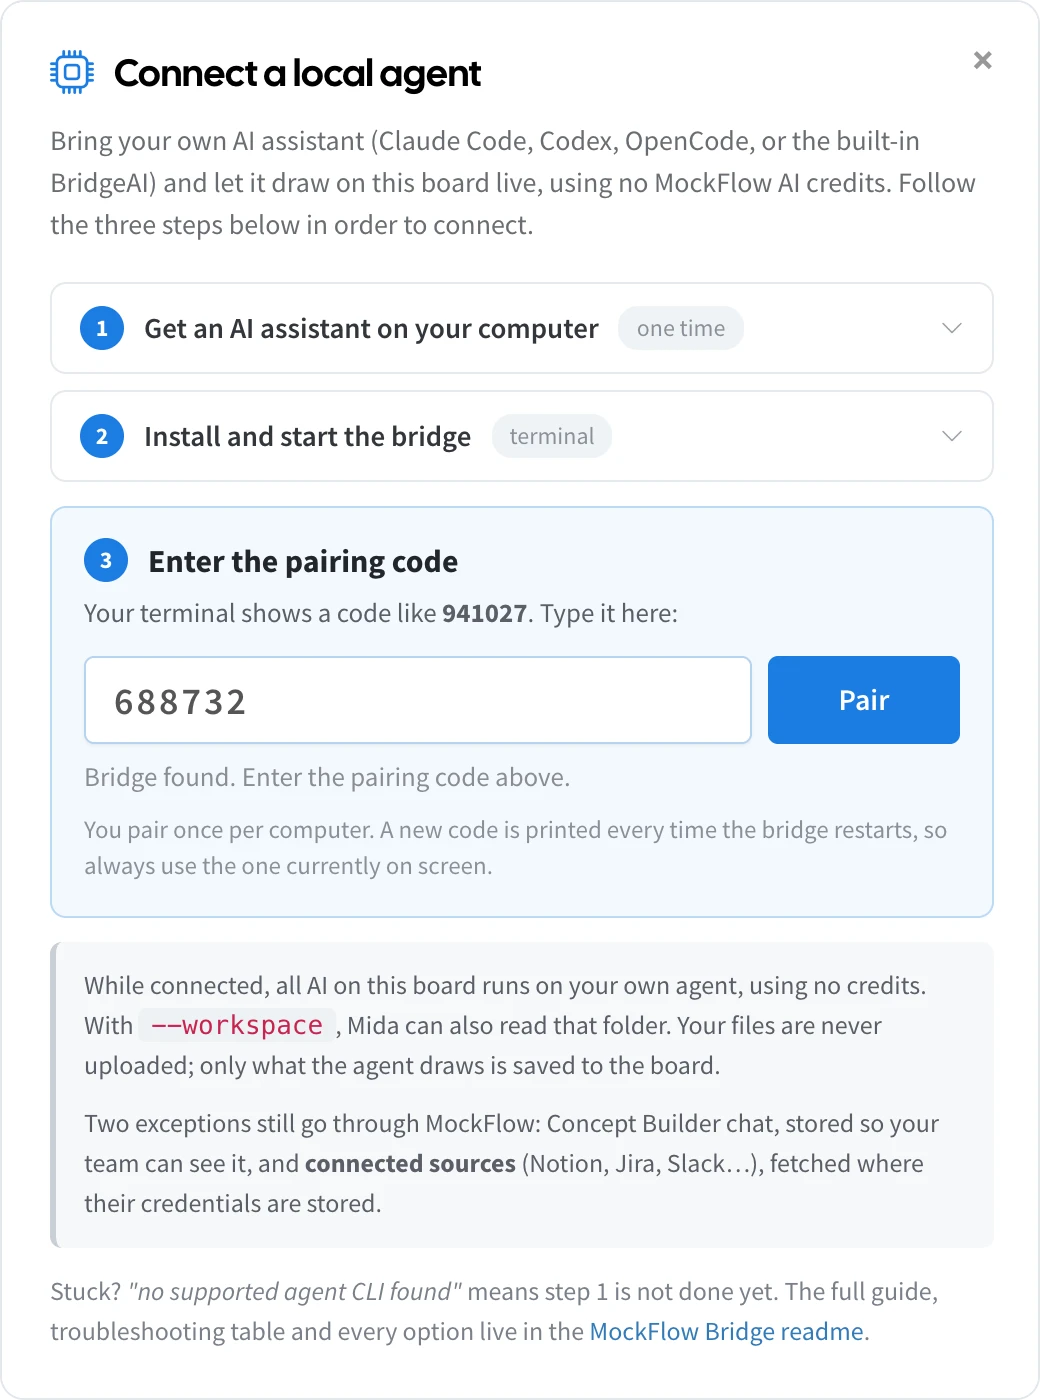
Under Enter the pairing code, type the code shown in your terminal and click Pair.
When pairing works, the strip turns green and reads Connected to followed by your agent's name (1). Mida confirms that it now answers and draws through your own agent.
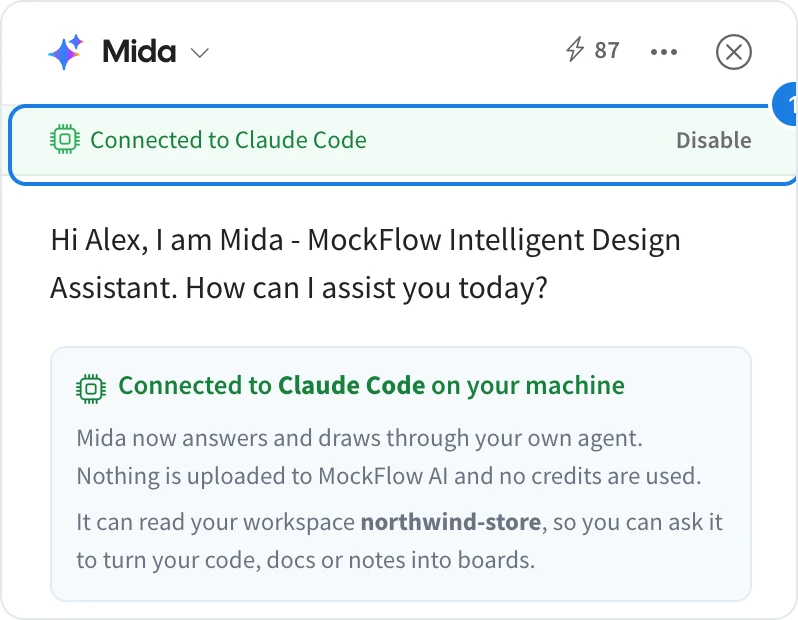
Ask Mida for anything as usual, for example a flowchart of a process, a mind map of a topic or a kanban board for a sprint. The reply and the drawing now come from your agent, and no AI credits are used.
Start Bridge again next time
You pair once per computer. Next time, run mockflow-bridge and open your board; if the strip does not show Connected, click Connect on it. A new pairing code is shown each time Bridge starts, and you only need it if the board asks for one again.
To stop using your agent, click Disable on the strip, or close the terminal window. The board goes back to MockFlow AI.
Keep MockFlow Bridge up to date
Run this command to install the newest version. It checks first and installs only if there is a newer one:
mockflow-bridge updateWhile Bridge is running, it also tells you when a new version is available, and you can press u in its window to update.