
Group, lock and layer items
Group items so they move as one, lock items in place, change which item sits on top, duplicate items and reuse an item's style on a MockFlow board.
As a board grows, some items belong together, some should stay exactly where they are, and some overlap. MockFlow gives you a set of commands for each case: group items so they move and resize as one, lock items so they cannot be moved by accident, change the layer order to decide which item sits on top, and duplicate, copy and restyle items without starting from scratch.
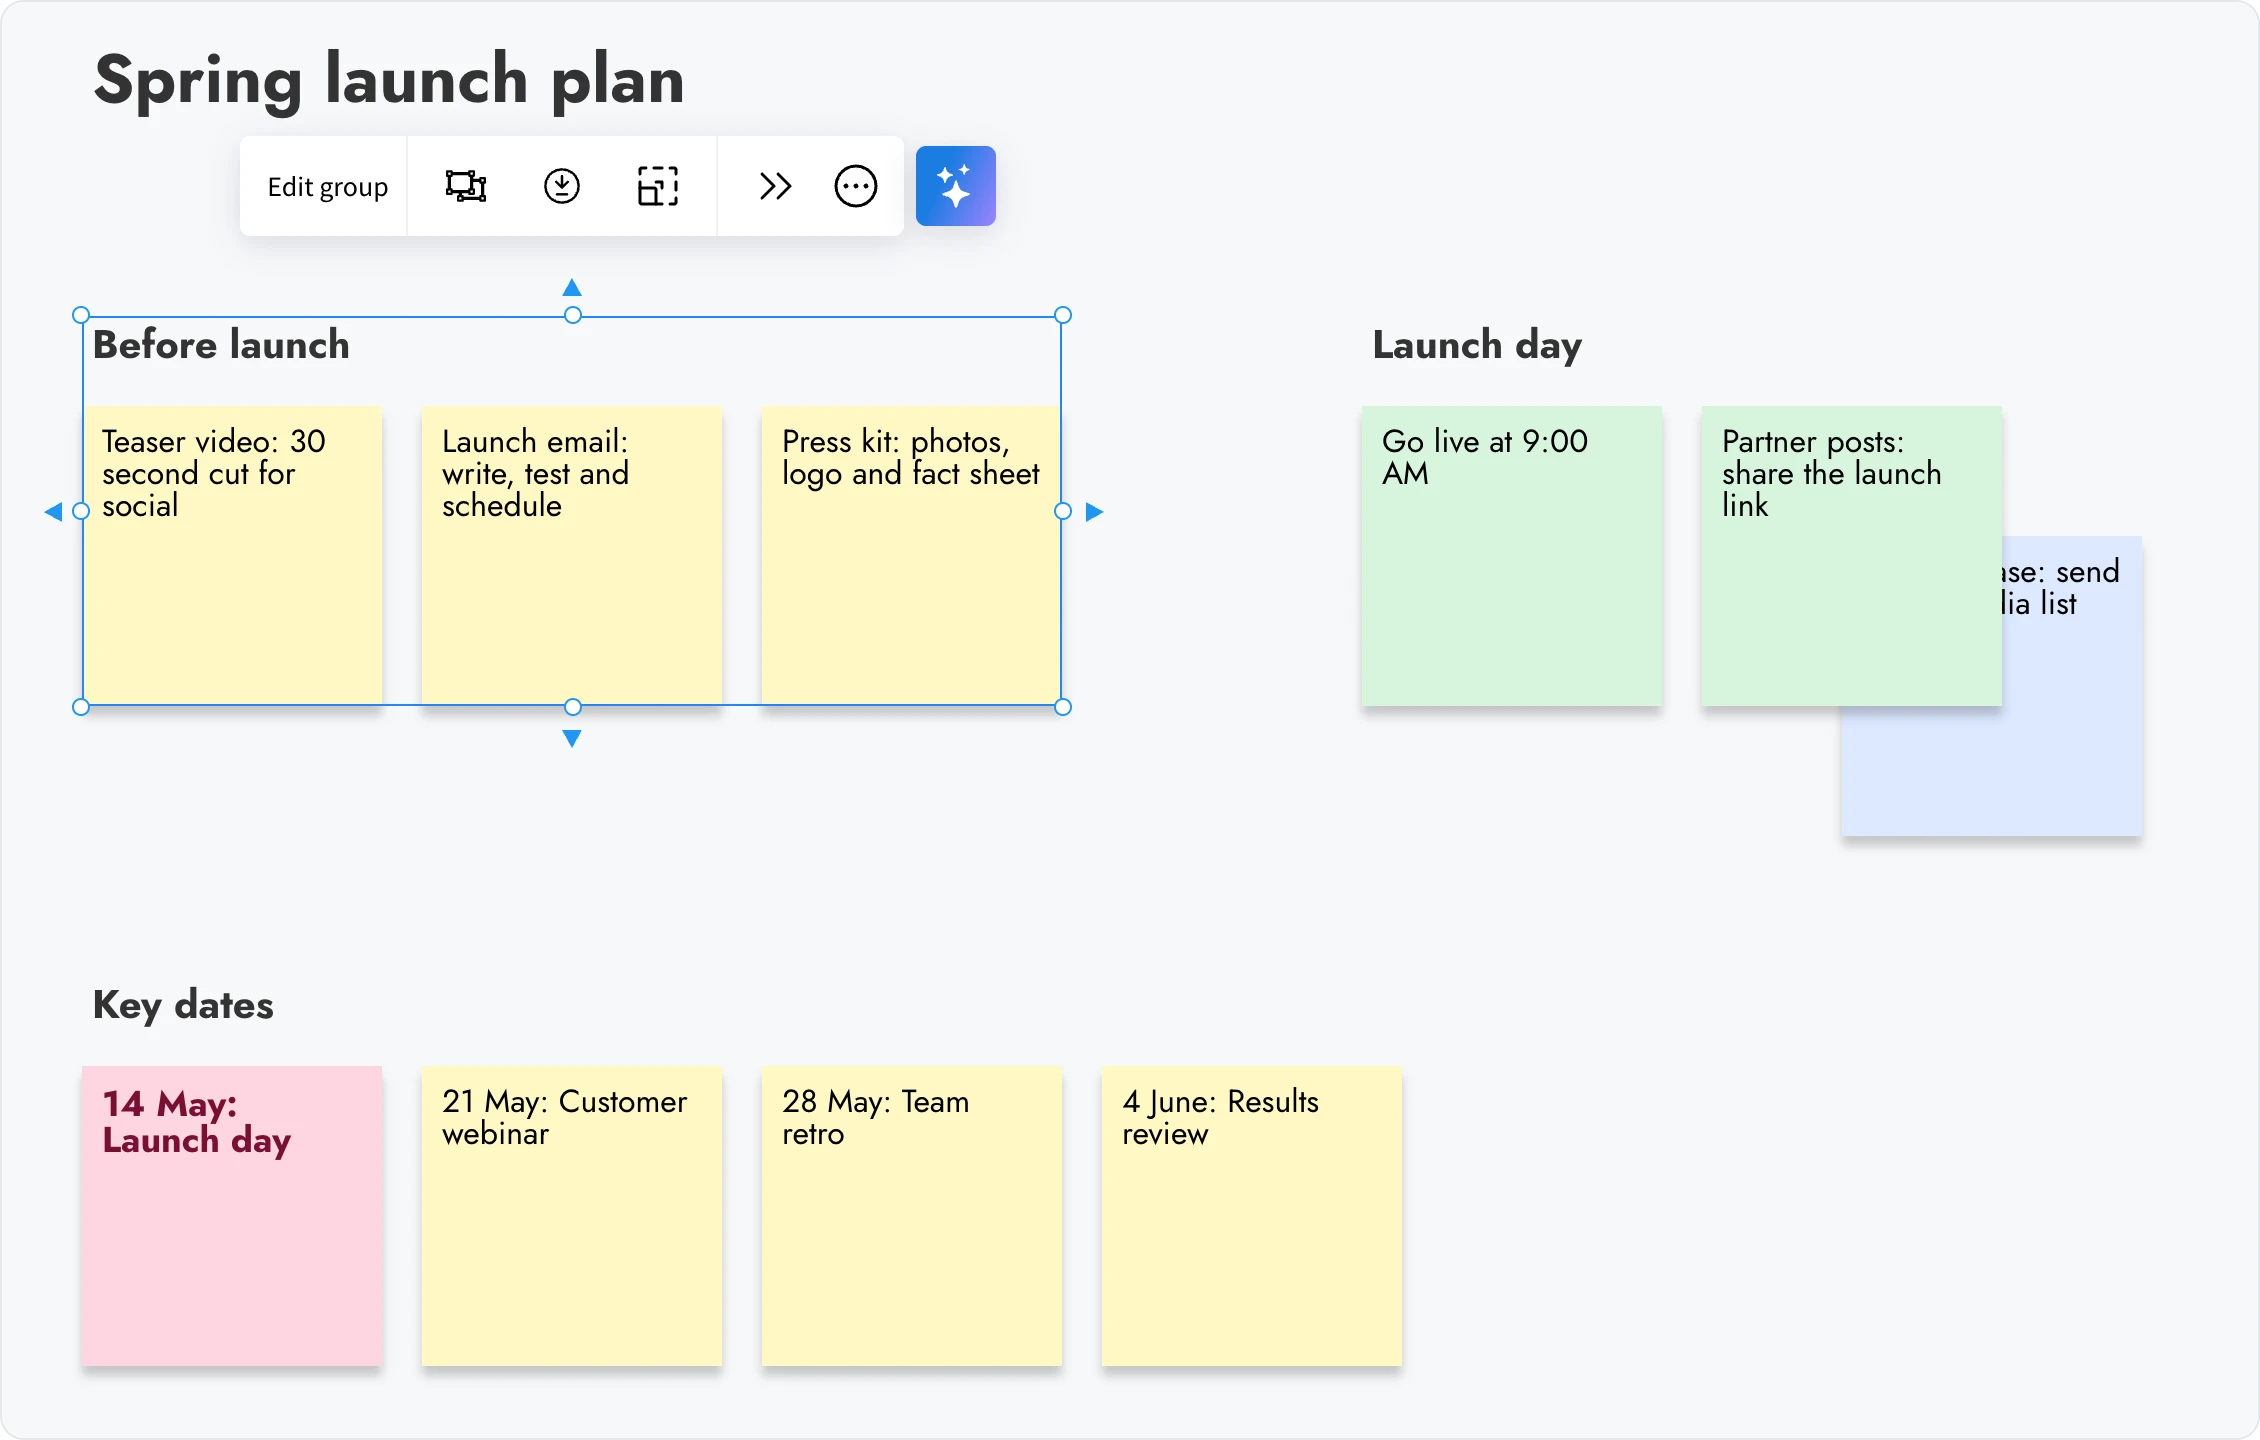
Group items so they move together

A group joins several items into one unit. Click any item in the group and the whole group is selected, so you can move, resize or export it in one step. Groups suit anything built from several parts: a heading and the notes under it, a card made of a shape, a label and an icon, or a legend for a diagram.
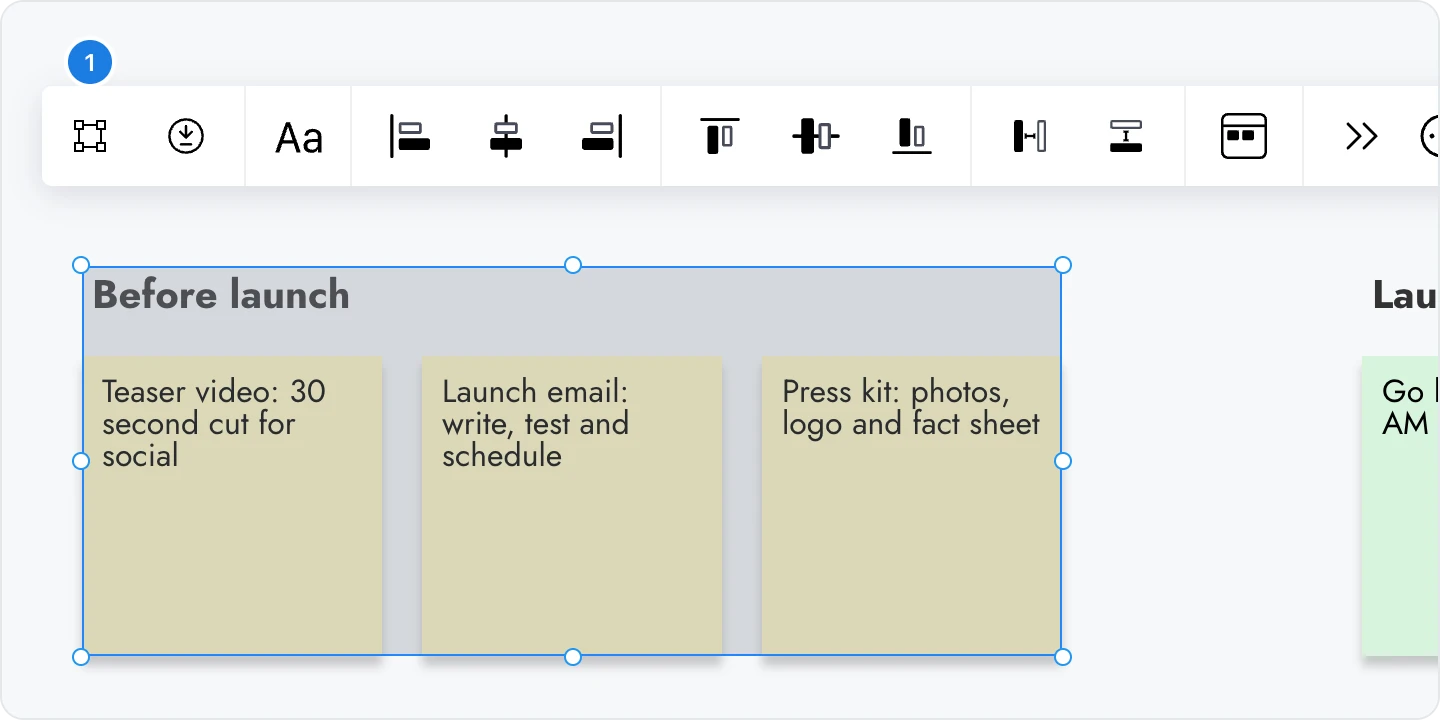
Select the items. Drag a selection box around them on an empty part of the canvas, or hold Shift and click each one.
Click Group items (1), the first button in the toolbar that appears above the selection. You can also press Ctrl+G (⌘G on Mac).
Drag any item in the group. Everything in the group moves with it.

To organize a part of the board under a visible title, with a background and optional automatic stacking, use a section instead. See Sections: group and organize items. A group has no frame of its own: it simply keeps its items together.
The group toolbar
Select a group and its toolbar appears above it.
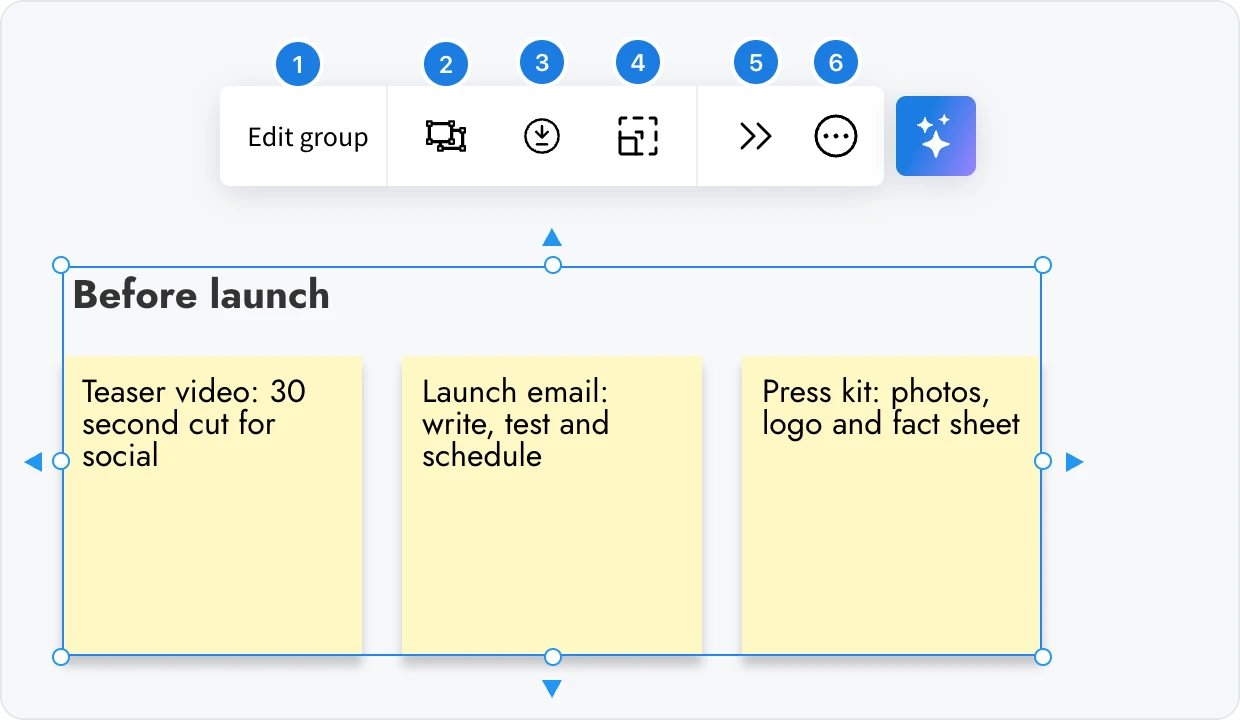
Edit group: work on the items inside the group without ungrouping them.
Un-Group items: separate the group back into individual items. You can also press Ctrl+Shift+G (⌘+Shift+G on Mac).
Export group as image: save the group as an image to share in a document, a slide or a message.
Toggle Maintain Size: keep the group's proportions when you resize it from a corner.
Toggle advanced settings: show or hide the group's advanced options.
Show edit menu: the same commands as the right-click menu, such as layer order and lock.
Edit an item inside a group
You can change one item in a group, for example to rewrite a sticky note or move it a little, while the group stays intact.
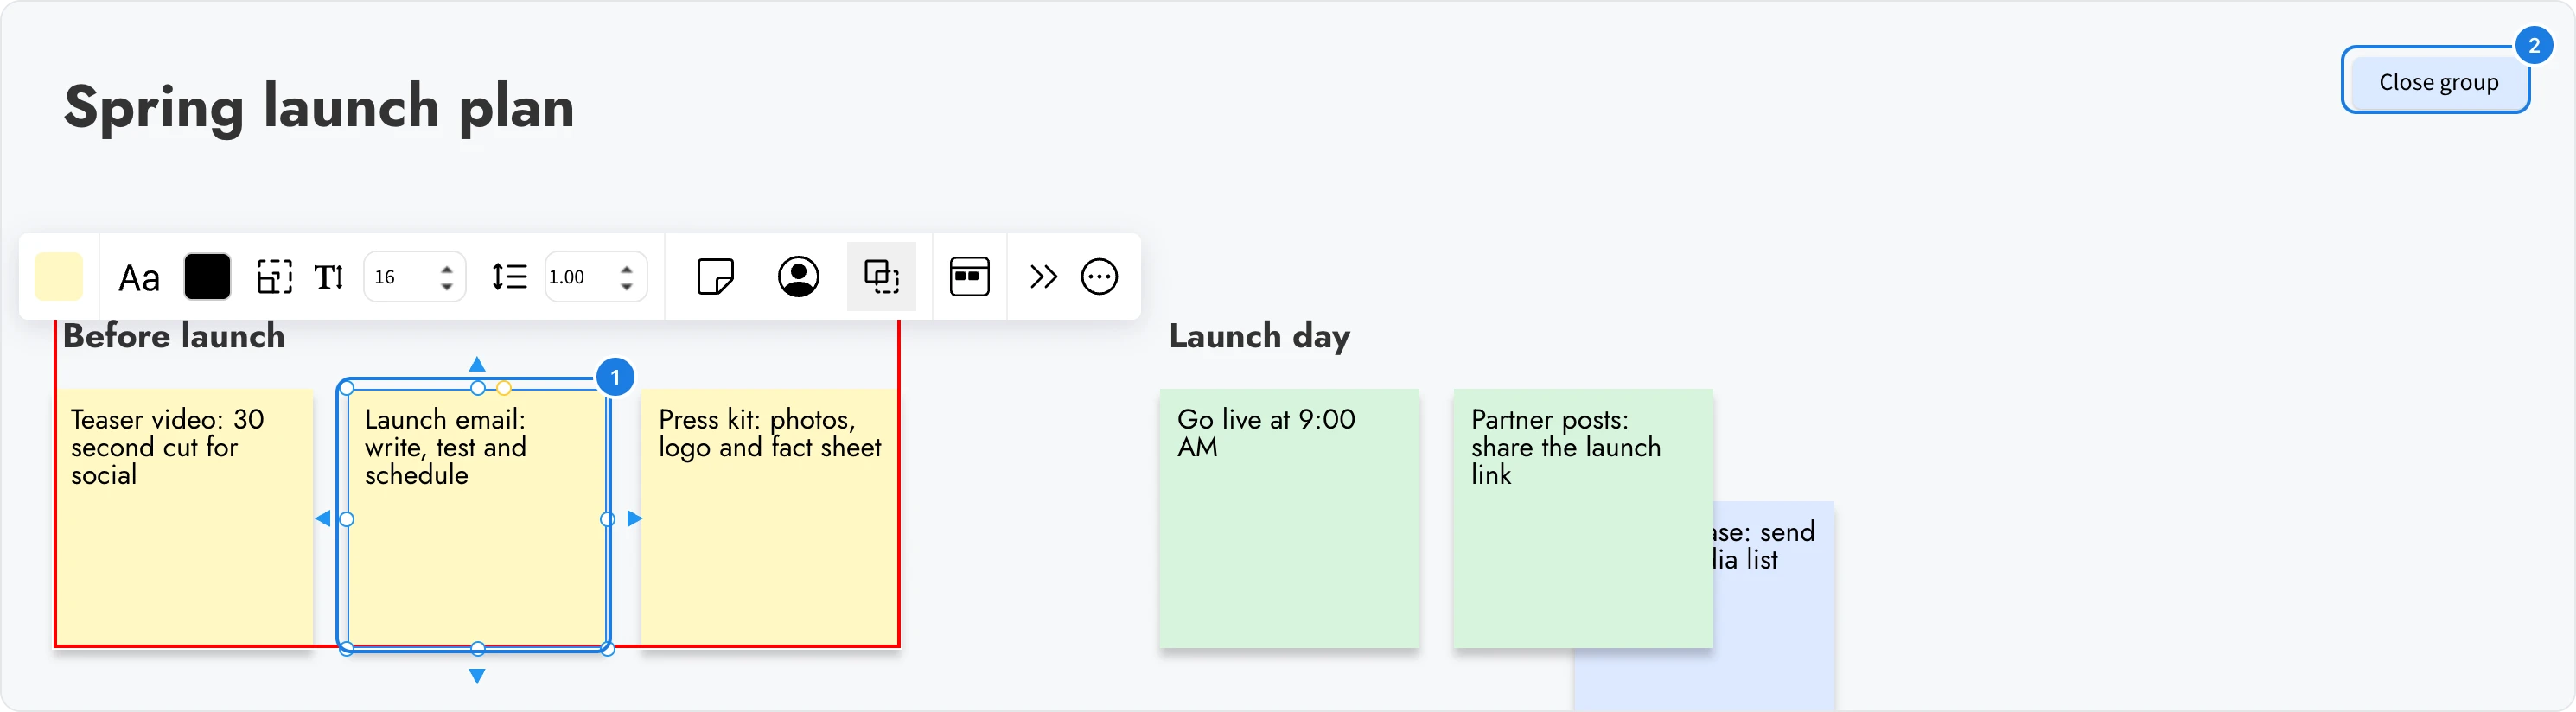
Select the group and click Edit group, or double-click the item you want to change.
Click an item inside the group (1). It is selected on its own, with its own toolbar, while the group is outlined.
Make your changes, then click Close group (2) at the top right of the board, or press Esc.
Lock items in place
Locking stops an item from being moved, resized or rotated by accident. Lock items that form the base of a board, such as a title, a background image, a template layout or a finished diagram, so you can work on top of them freely.
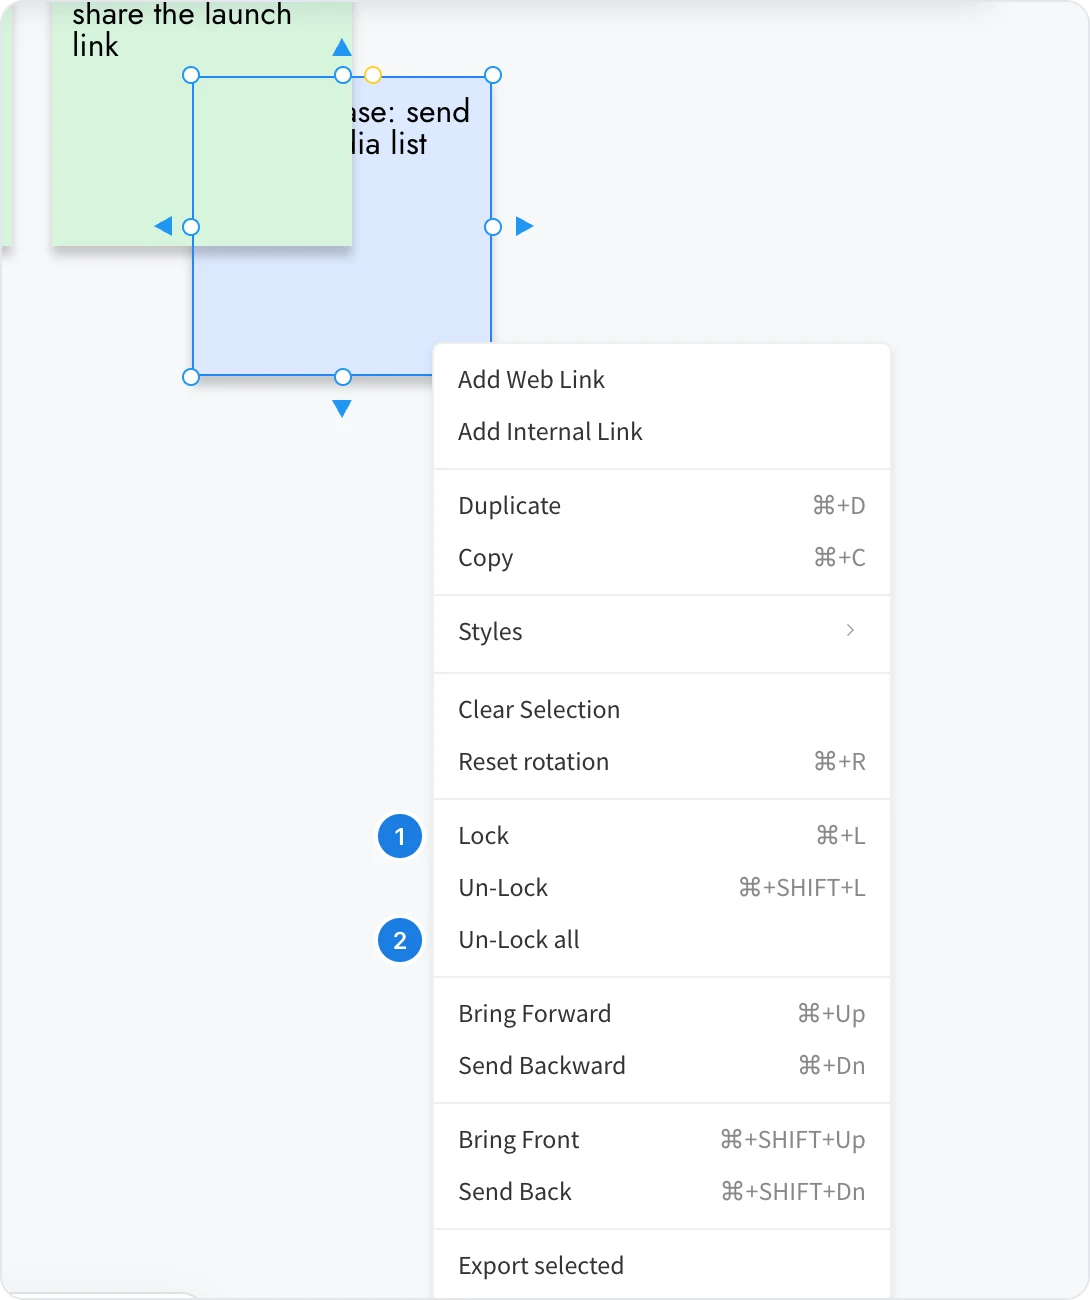
Select one or more items, or a group.
Right-click the selection and choose Lock (1), or press Ctrl+L (⌘L on Mac).
A locked item stays where it is when you drag it. When you click it, it shows no handles, and an Un-Lock button appears at the top left of the board instead.
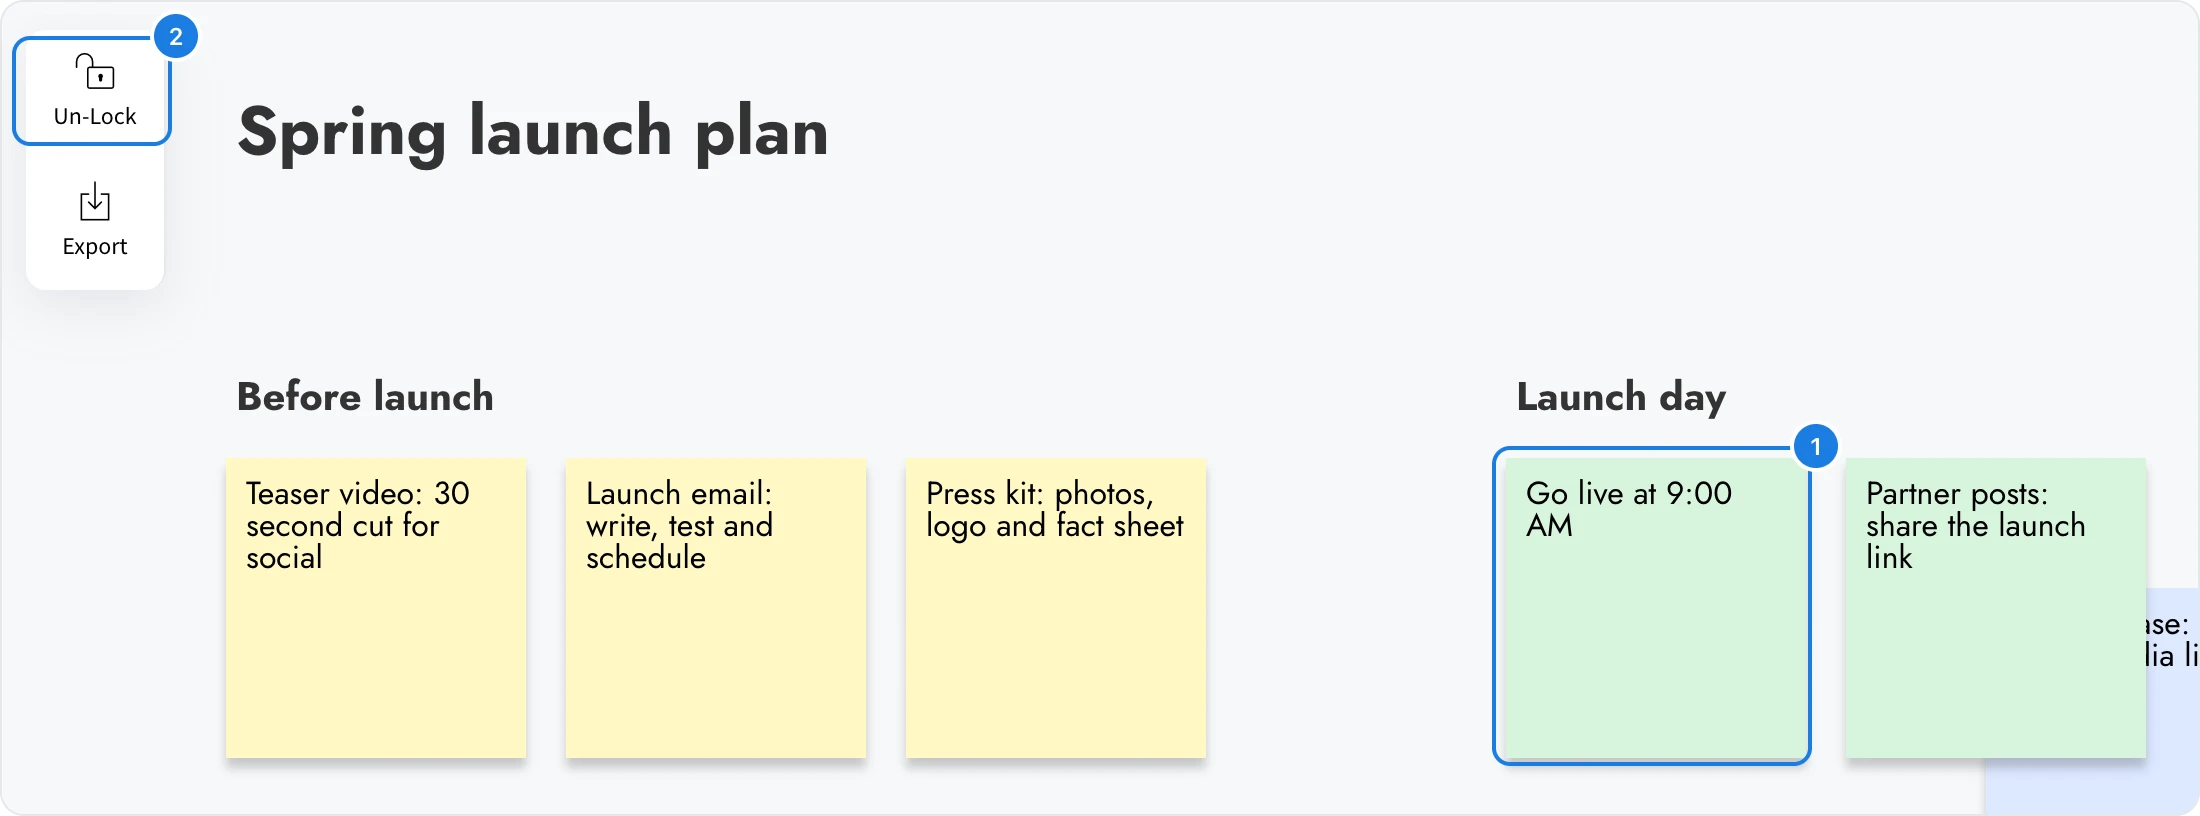
To unlock items:
One item: click it, then click Un-Lock (2) at the top left of the board, or press Ctrl+Shift+L (⌘+Shift+L on Mac).
Every item on the board: right-click any item or the empty canvas and choose Un-Lock all (2 in the menu above).
Change which item is on top
When items overlap, the layer order decides which item covers which, for example to bring a note out from behind another one, or to send a background shape behind the notes placed on it.
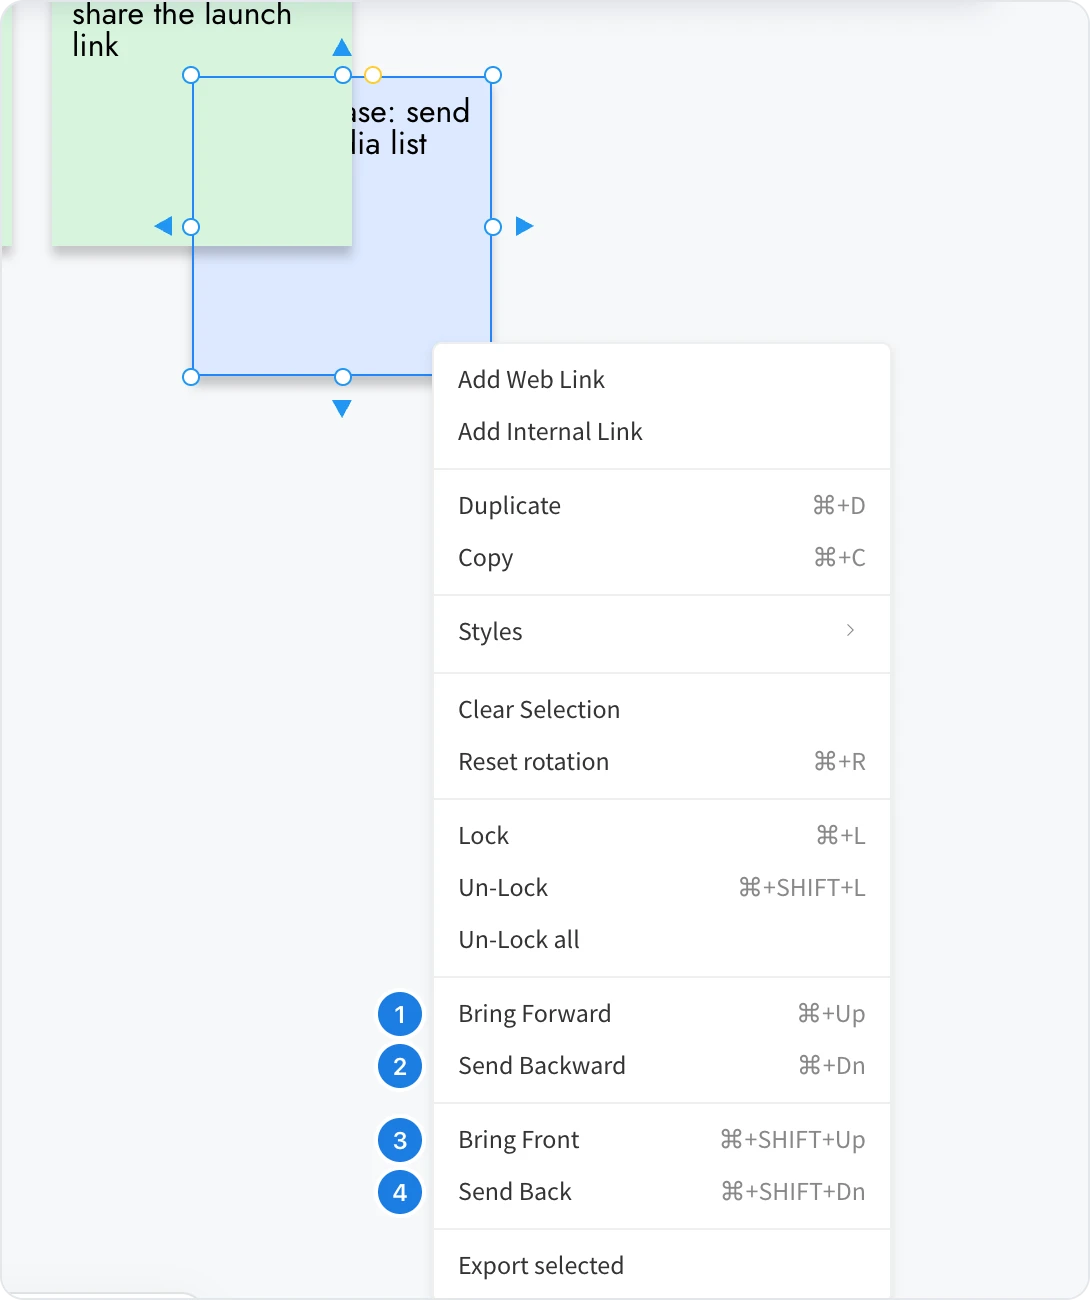
Select the item. If it is partly hidden, click the part you can see.
Right-click it and choose an option:
Bring Forward (1): move it one step up, over the next item.
Send Backward (2): move it one step down, under the next item.
Bring Front (3): put it on top of every other item.
Send Back (4): put it behind every other item.

The same commands have keyboard shortcuts: Ctrl+Up and Ctrl+Down (⌘+Up and ⌘+Down on Mac) move an item one step, and Ctrl+Shift+Up and Ctrl+Shift+Down (⌘+Shift+Up and ⌘+Shift+Down on Mac) move it to the front or the back.
Duplicate and copy items
Duplicating is the quickest way to make another item like one you already have, such as a sticky note with the same color and font, or a card you built from several parts.
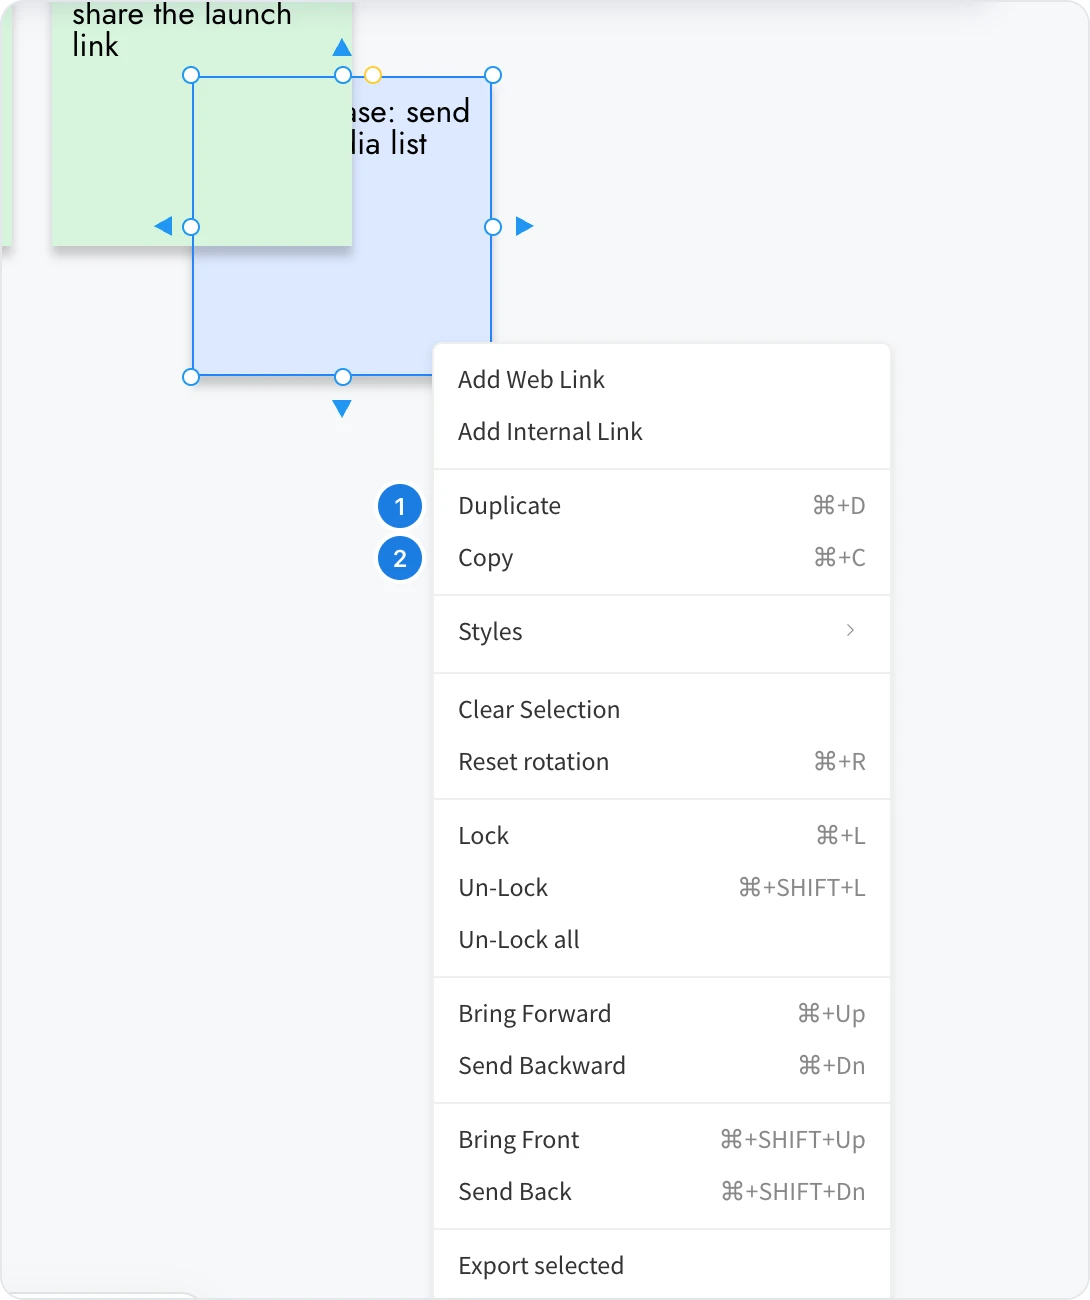
Duplicate (1): right-click an item and choose Duplicate, or press Ctrl+D (⌘D on Mac). The copy appears next to the original, ready to edit. It works on several items or a group at once.
Copy (2): right-click and choose Copy, or press Ctrl+C (⌘C on Mac), then paste with Ctrl+V (⌘V on Mac).
Paste-in-place pastes the copied items at exactly the position they were copied from, so the copy lines up with the rest of the layout.
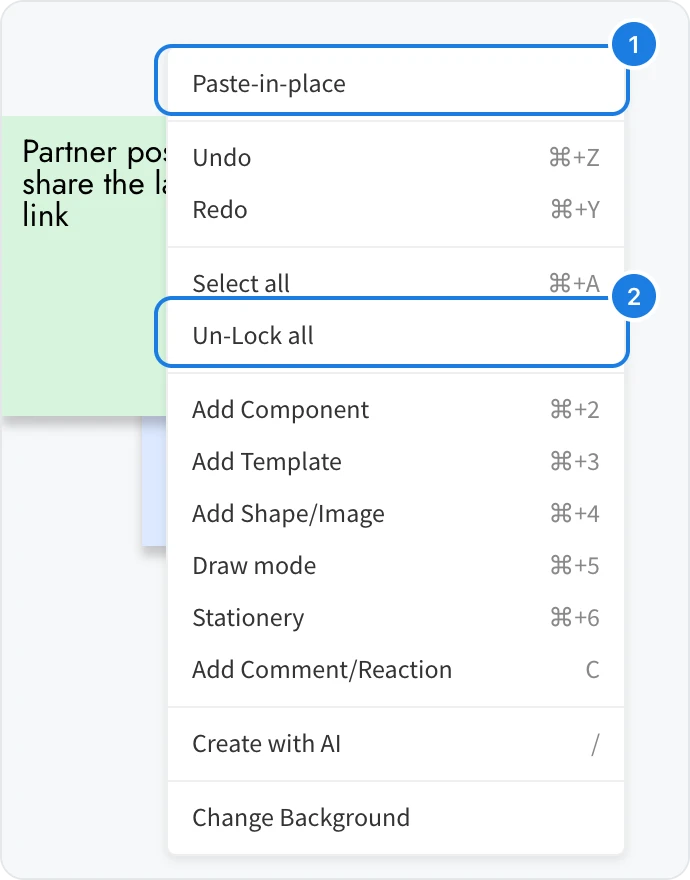
Copy the items.
Right-click an empty part of the canvas.
Choose Paste-in-place (1).
Copy the style of one item to others
Copy Styles and Paste Styles give several items the same look in two steps: fill color, border, shadow and font settings. Each item keeps its own text, size and position.
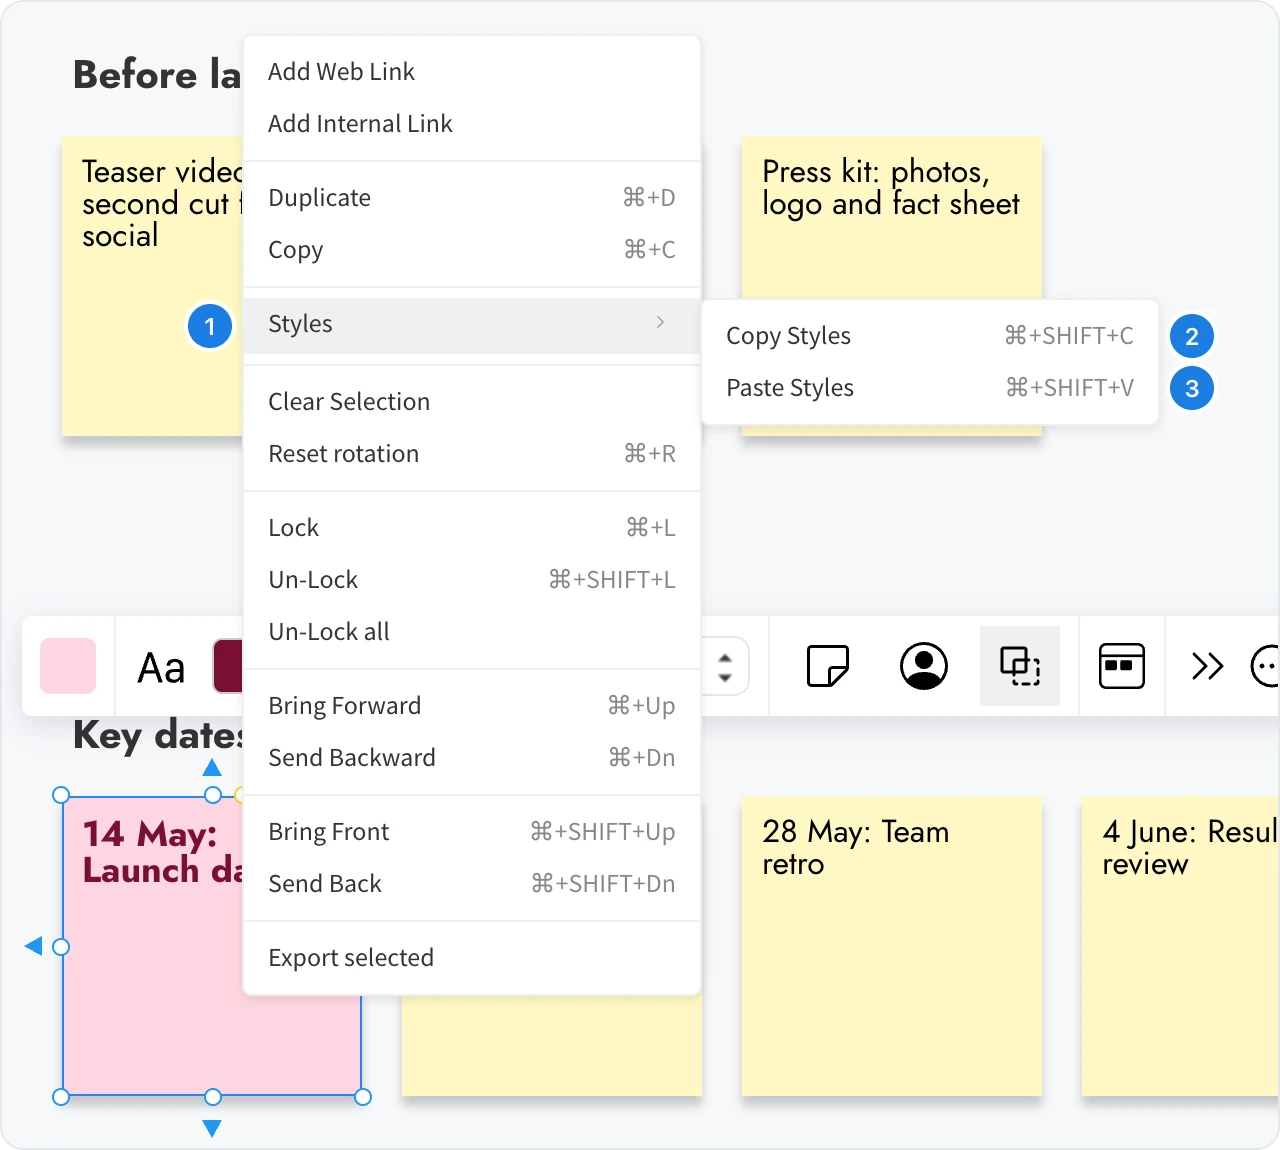
Right-click the item whose look you want to reuse, point to Styles (1) and choose Copy Styles (2), or press Ctrl+Shift+C (⌘+Shift+C on Mac).
Select the items that should get the same look. They need to be the same kind of item, for example all sticky notes.
Right-click the selection, point to Styles and choose Paste Styles (3), or press Ctrl+Shift+V (⌘+Shift+V on Mac).
Copy Styles works on one item at a time. To reuse the look of an item inside a group, open the group with Edit group first.
Keyboard shortcuts
Action | Windows | Mac |
|---|---|---|
Group items | Ctrl+G | ⌘G |
Un-Group items | Ctrl+Shift+G | ⌘+Shift+G |
Lock | Ctrl+L | ⌘L |
Un-Lock | Ctrl+Shift+L | ⌘+Shift+L |
Bring Forward | Ctrl+Up | ⌘+Up |
Send Backward | Ctrl+Down | ⌘+Down |
Bring Front | Ctrl+Shift+Up | ⌘+Shift+Up |
Send Back | Ctrl+Shift+Down | ⌘+Shift+Down |
Duplicate | Ctrl+D | ⌘D |
Copy Styles | Ctrl+Shift+C | ⌘+Shift+C |
Paste Styles | Ctrl+Shift+V | ⌘+Shift+V |
To select, move, resize and rotate items, see Select, move, resize and rotate items. To line items up and space them evenly, see Align, space and snap items. To change colors, fonts and borders, see Change how an item looks.