
Select, move, resize and rotate items
Select one item or many on a MockFlow board, then move, nudge, resize, rotate and delete them with the mouse, the toolbar or the keyboard.
Everything you place on a MockFlow board, from a sticky note to a frame or an embedded video, is an item you can select and arrange. Selecting an item shows its handles and its toolbar. From there you can move it, change its size, turn it to any angle or delete it. This article covers the actions every item shares on the visual canvas. The options in the toolbar itself are explained in Change how an item looks.
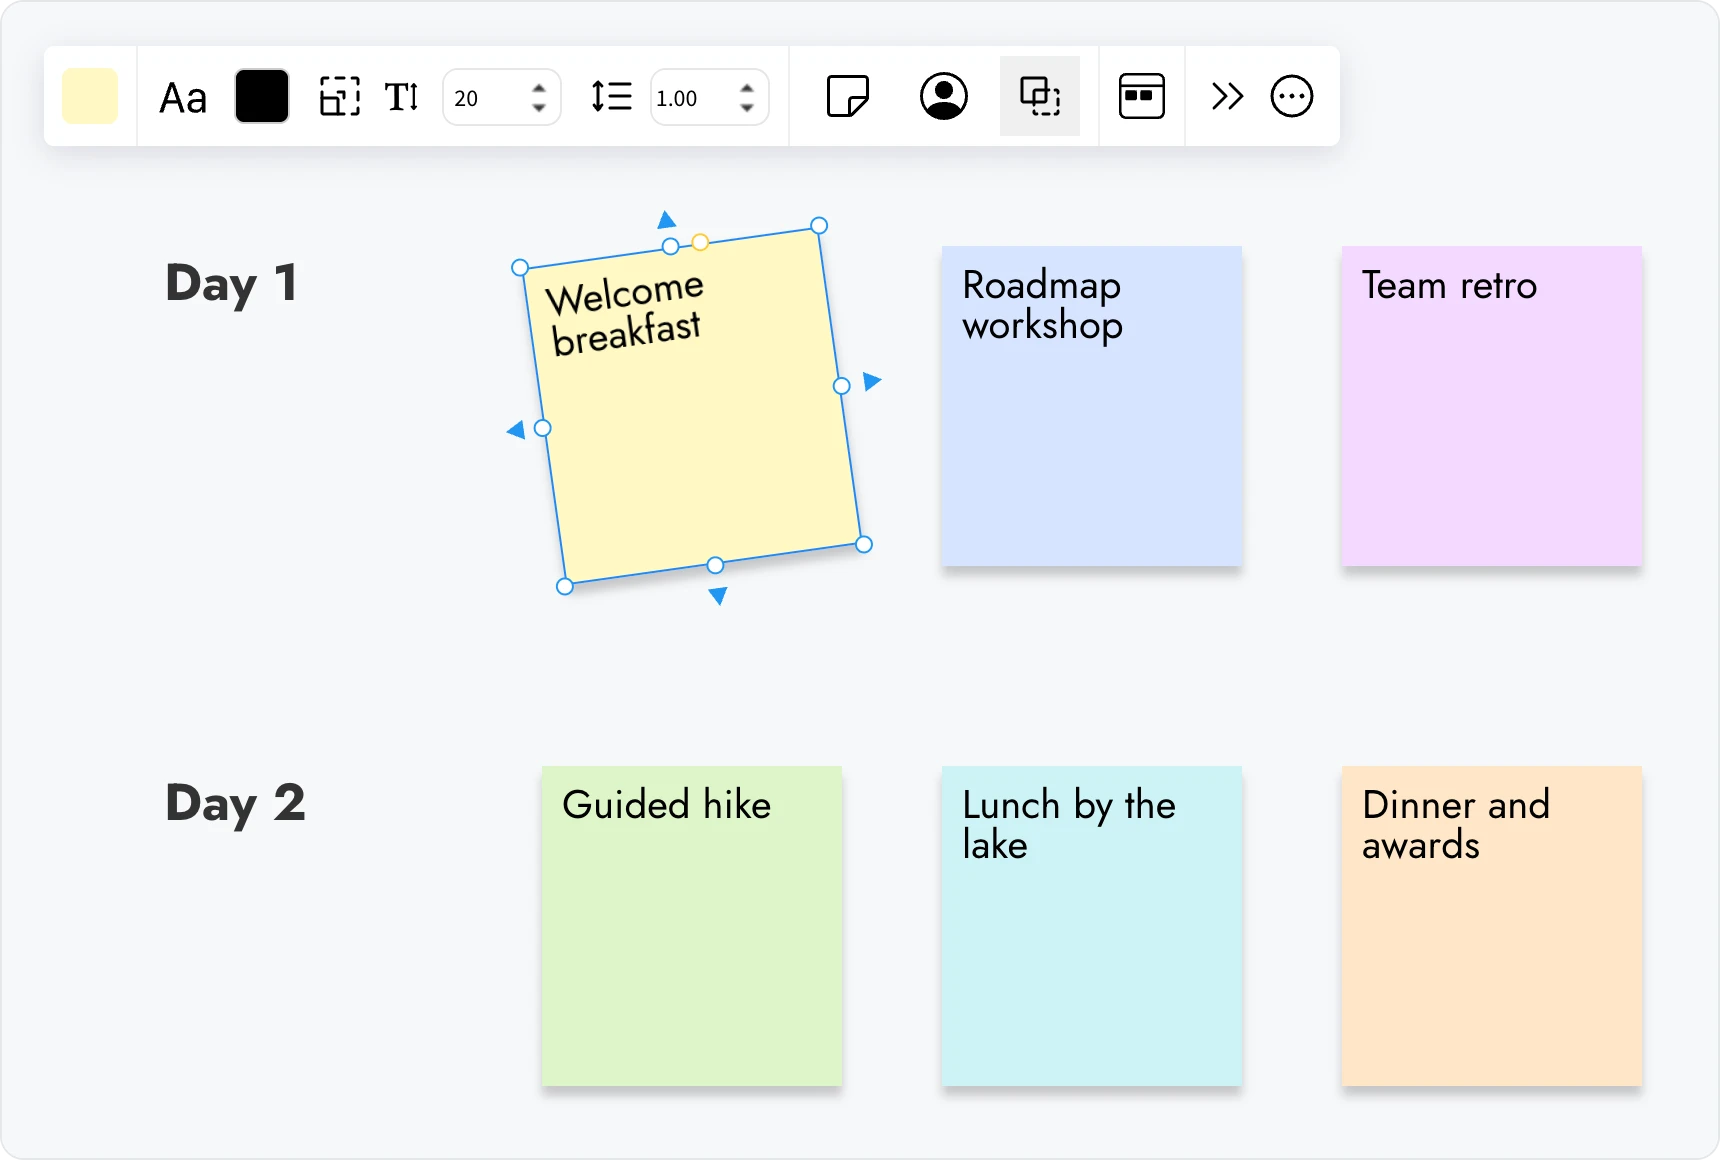
Select an item
Click an item to select it. A blue box with handles appears around it, and the item's toolbar opens above it.
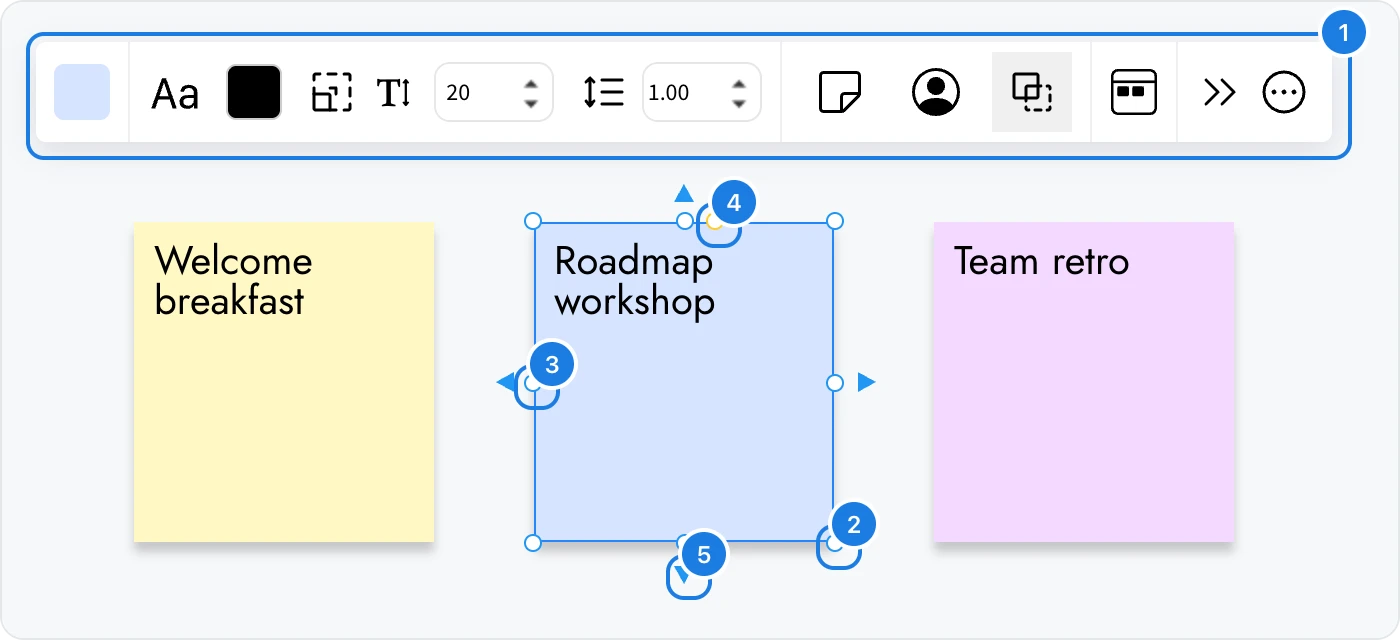
Toolbar: the options for this kind of item, such as its color, font and edit menu.
Corner handles: drag to change the width and the height together.
Side handles: drag to change only the width or only the height.
Rotate handle: the small dot beside the top handle. Drag it to turn the item.
Connector arrows: drag one to draw a connector from this item to another.
Items are selected in Edit mode, the mode a board opens in. In Play mode, a click uses an item instead of selecting it, for example ticking a task in a checklist. See Edit mode and Play mode.
Select several items at once
Select several items to move, align or delete them together. They share one selection box, and the toolbar shows options for the whole selection.

There are four ways to select several items:
Drag a selection box: press on an empty part of the canvas and drag across the items. Every item that sits completely inside the box is selected. Items the box only partly covers are left out.
Shift+click: with one item selected, hold Shift and click more items to add them. Shift+click an item that is already selected to remove it from the selection.
Ctrl+click (⌘+click on Mac): works like Shift+click to add items.
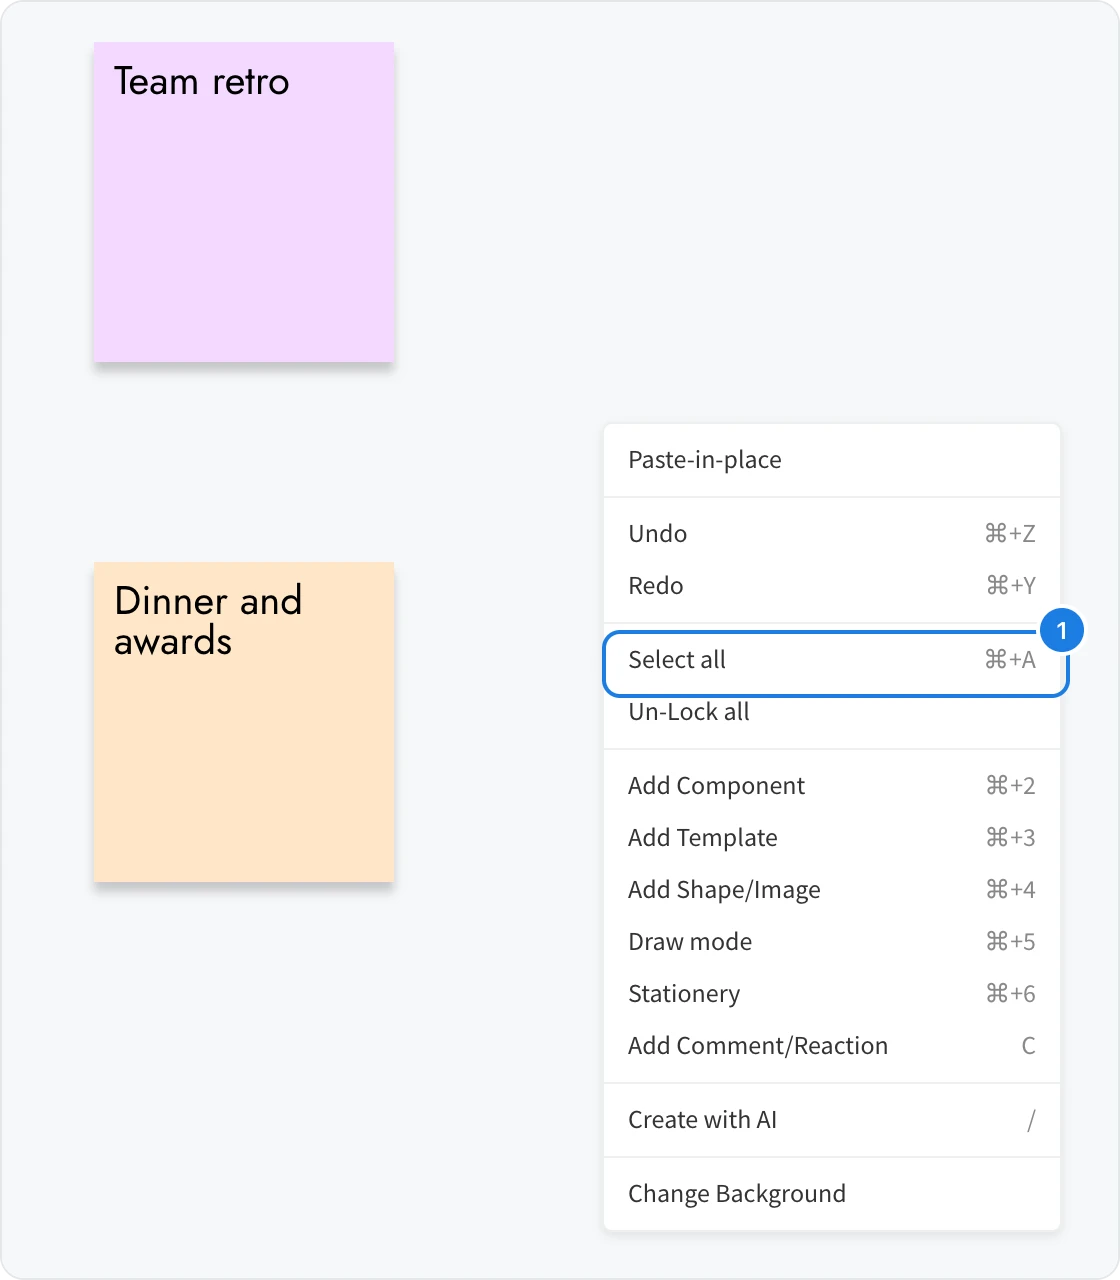
Select all: press Ctrl+A (⌘A on Mac), or right-click an empty part of the canvas and choose Select all (1). Every item on the board is selected.
To line up the selected items or space them evenly, see Align, space and snap items. To keep them together as one unit, see Group, lock and layer items.
Clear the selection
To deselect everything, do one of these:
Click an empty part of the canvas.
Press Escape.
Click Show edit menu, the last button in the toolbar, and choose Clear Selection.
Move items
Drag a selected item, or any item, to a new place on the board. When several items are selected, drag any one of them and the others move with it, keeping their places in relation to each other, as in the animation above.
For small, exact moves, use the arrow keys:
Keys | Moves the selected items |
|---|---|
Arrow keys | 1 pixel in that direction |
Shift + arrow keys | 10 pixels in that direction |
Moving a section also moves every item inside it. See Sections: group and organize items.
To place items on an even grid or line them up with other items as you drag, turn on snapping. See Align, space and snap items.
Resize an item

Select the item.
Drag a corner handle to change the width and the height together, or drag a side handle to change one of them.
To keep the item's proportions while you drag a corner, hold Shift.
Some items, such as photos, always keep their proportions.
To resize several items at once, select them and drag a handle of the shared selection box.
Rotate an item

Select the item.
Point to the rotate handle, the small dot beside the handle at the middle of the top edge.
Drag it to the left or the right. The item turns around its center.
Rotation is available for one item at a time, so the rotate handle does not appear when several items are selected. Some items, such as frames, cannot be rotated and show no rotate handle.
Set an exact size or angle
The Transform panel in the advanced settings sets the size and the angle of an item with numbers.
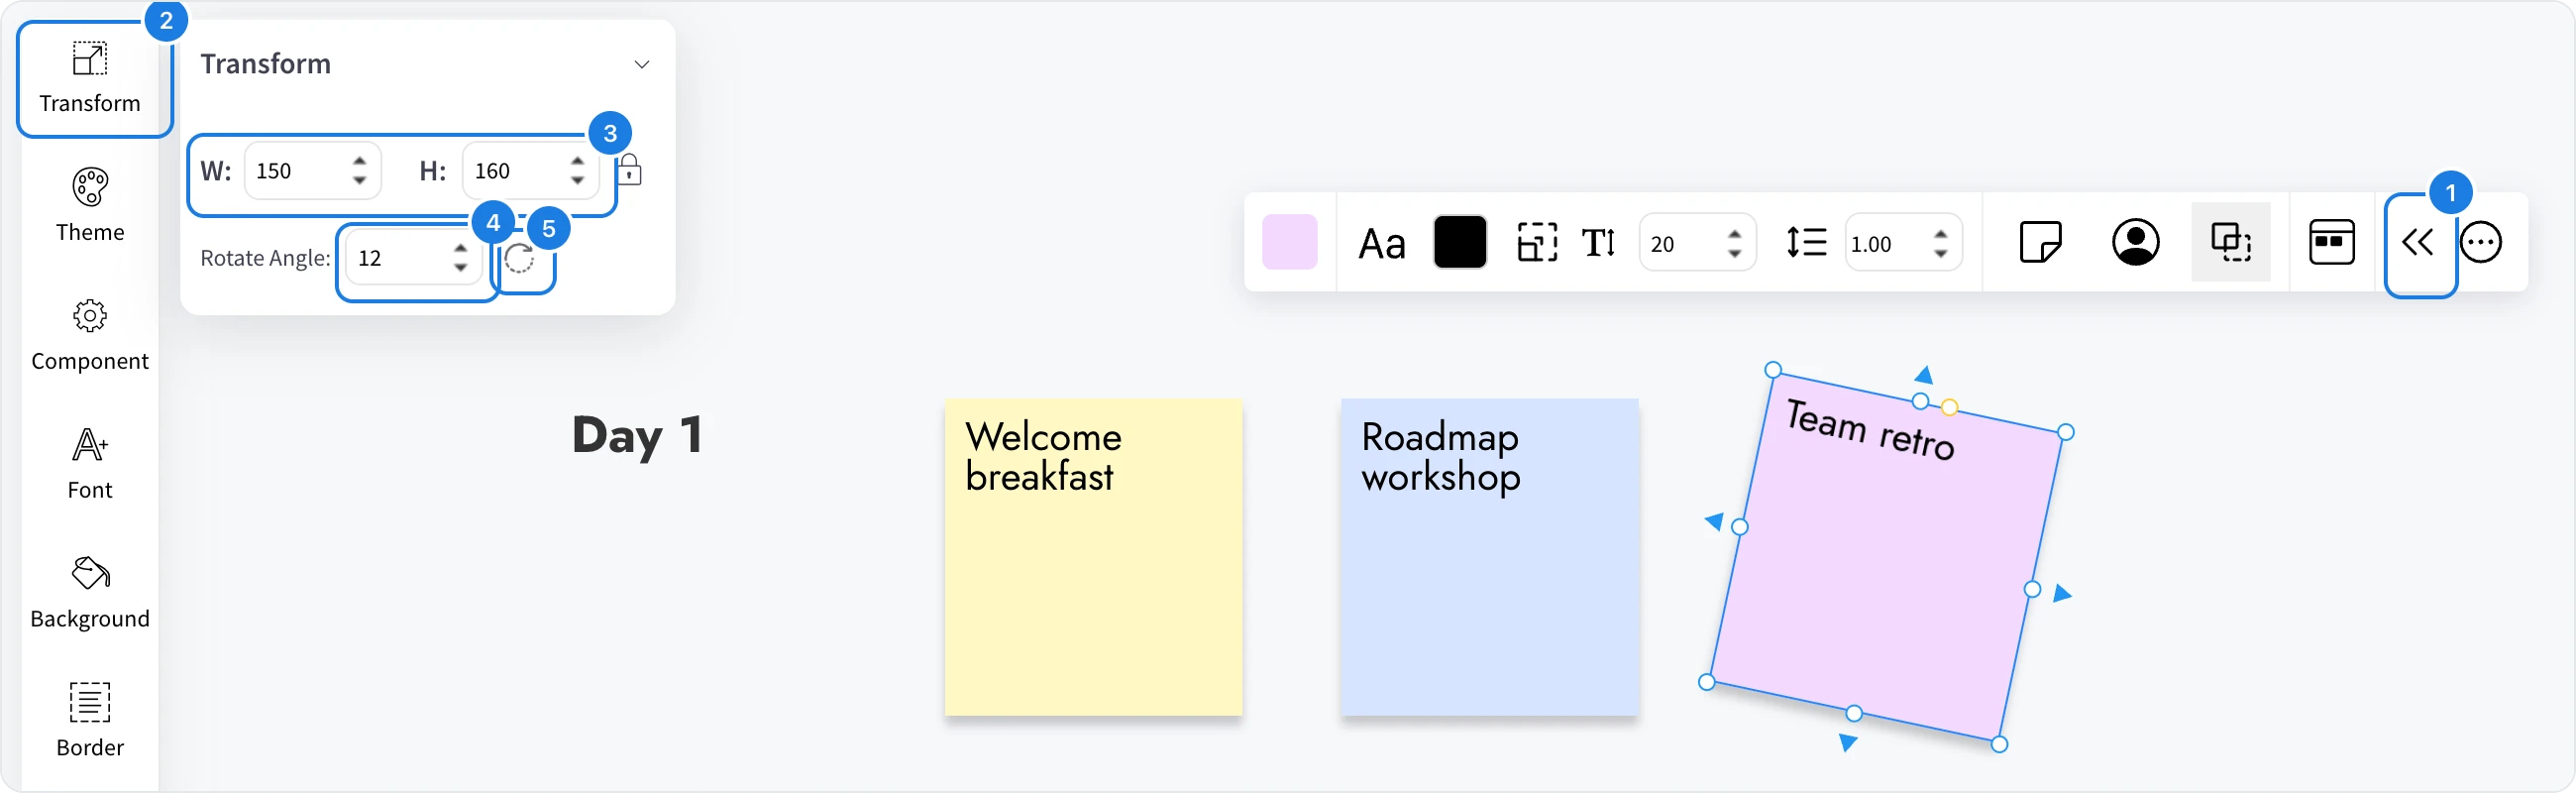
Select the item and click Toggle advanced settings (1) in its toolbar.
Click Transform (2) in the panel that opens on the left.
Type a width in W and a height in H (3), in pixels.
Type an angle in Rotate Angle (4), from -360 to 360 degrees.
To turn the item a quarter turn, click the rotate button (5). Each click turns it to the next of 90, 180 and 270 degrees, and then back to 0.
Reset the rotation
Resetting the rotation turns an item straight again, with an angle of 0 degrees.
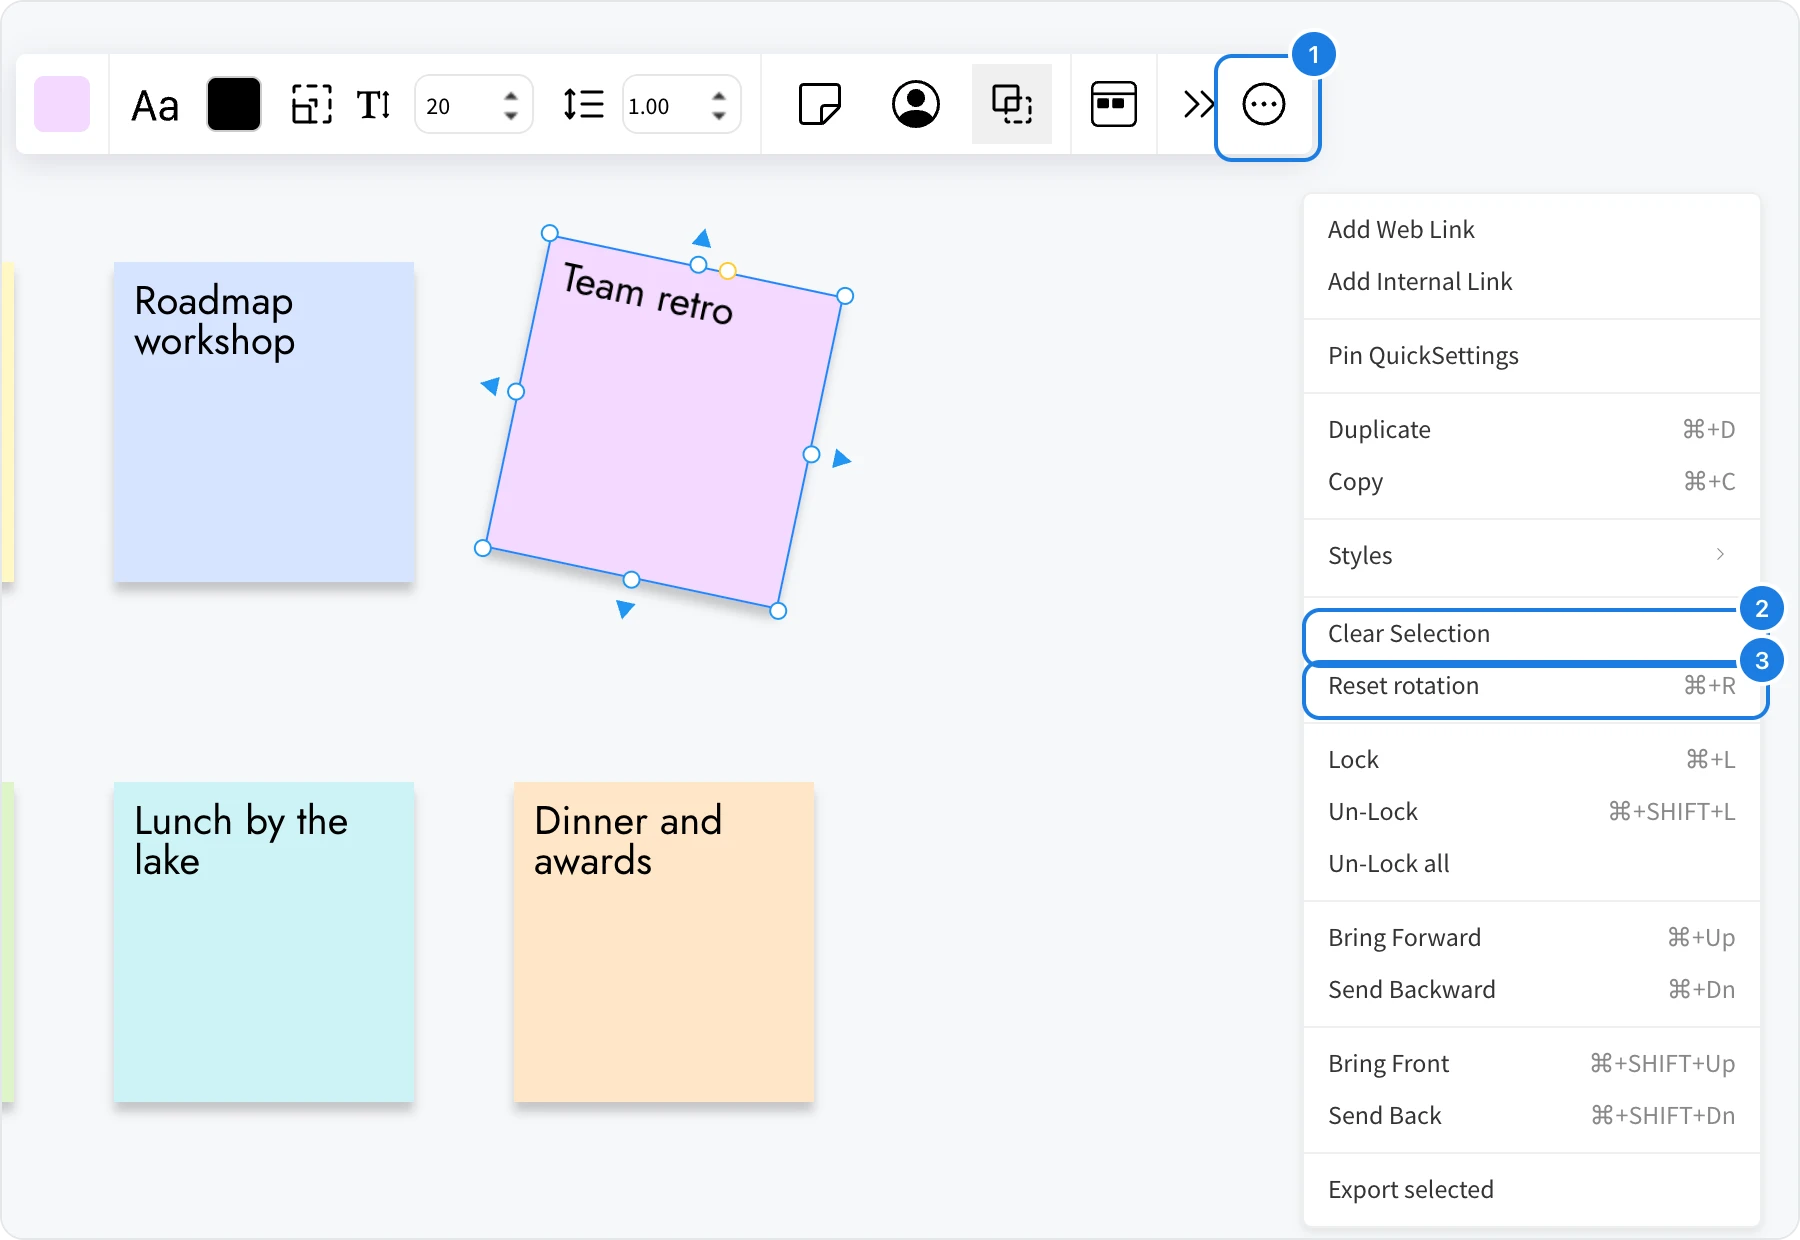
Select the rotated item.
Click Show edit menu (1), the last button in the toolbar.
Choose Reset rotation (3).
You can also press Ctrl+R (⌘R on Mac), or right-click the item and choose Reset rotation.
Delete items
Select the item, or select several items.
Press Delete or Backspace.
If you delete something by mistake, press Ctrl+Z (⌘Z on Mac) to undo it.
Deleting a section also deletes every item inside it. To remove only the section and keep its contents, see Sections: group and organize items.
Keyboard shortcuts for selecting and arranging
Action | Windows | Mac |
|---|---|---|
Add an item to the selection | Shift+click or Ctrl+click | Shift+click or ⌘+click |
Select all items | Ctrl+A | ⌘A |
Clear the selection | Escape | Escape |
Move by 1 pixel | Arrow keys | Arrow keys |
Move by 10 pixels | Shift + arrow keys | Shift + arrow keys |
Keep proportions while resizing | Hold Shift | Hold Shift |
Reset rotation | Ctrl+R | ⌘R |
Delete | Delete or Backspace | Delete or Backspace |
Undo | Ctrl+Z | ⌘Z |