
Create and organize spaces
Use spaces to keep the boards of a team, client or project together. Create a space, add boards to it, rename it and arrange your spaces in the sidebar.
A space keeps the boards of one team, client or project together in one place. Everyone you invite to a space gets access to everything in it, so a space is also how you share a whole body of work at once instead of board by board. Spaces appear under Spaces in the workspace sidebar.
Private boards and spaces
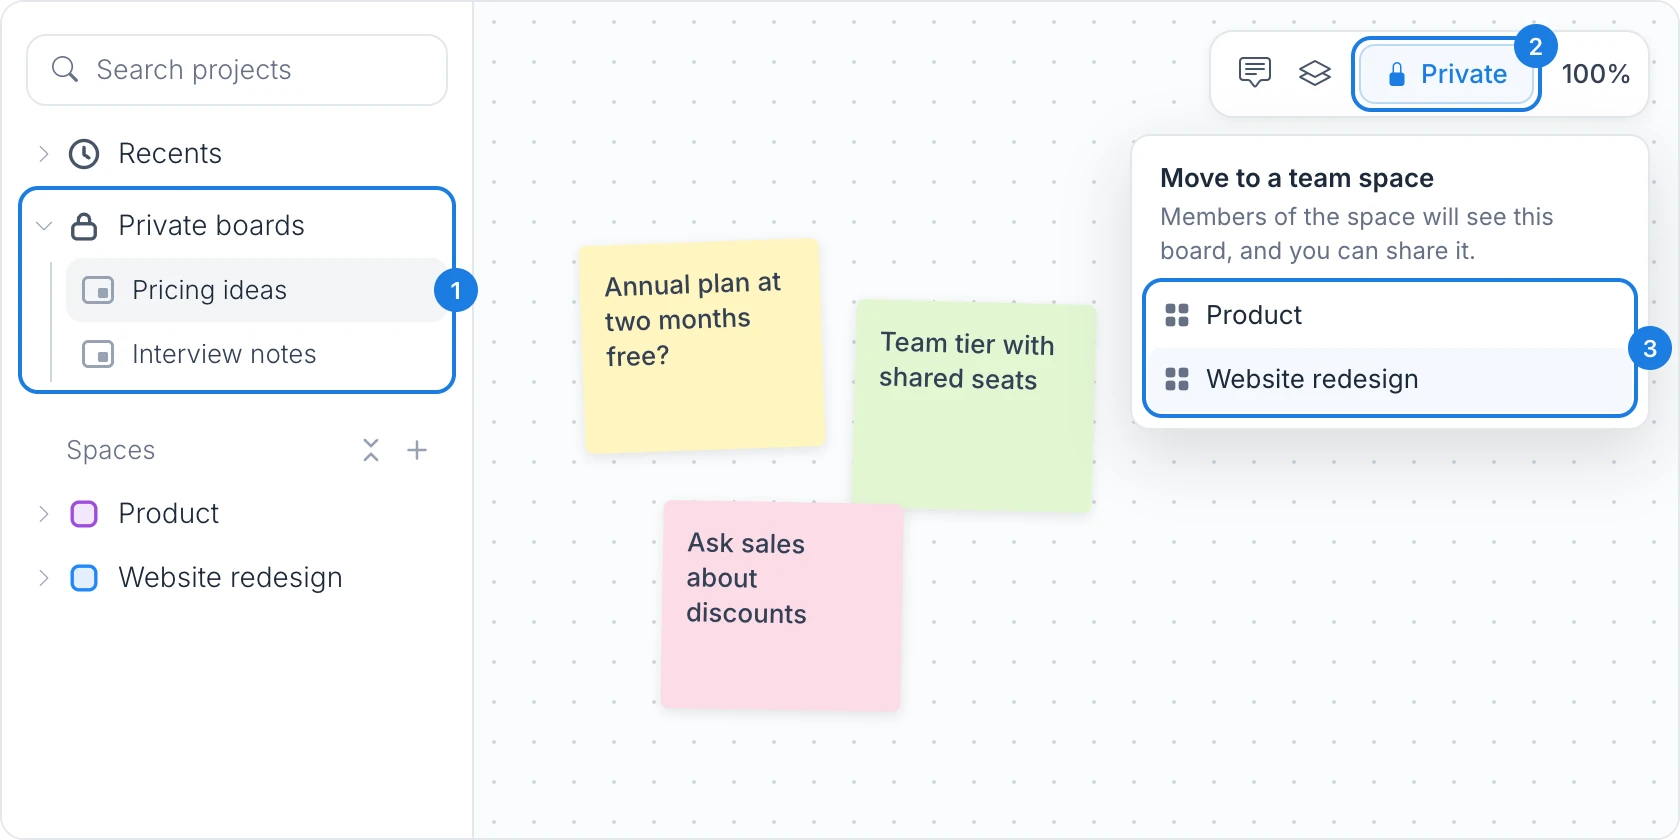
Above your spaces, Private boards (1) holds boards that only you can see. MockFlow creates it with your first board. It is the place for personal work and early ideas that are not ready to share.
Private boards cannot be shared. A board in Private boards shows a Private tag (2) at the top of the canvas where other boards show Share, and it has no team chat or meetings. When the work is ready for others:
Click the Private tag (2) on the board.
Under Move to a team space, choose a space (3).
The board moves into that space. Its members can see it, and you can share it.
You can also drag a board from Private boards onto a space in the sidebar. Moving boards out of Private boards is not available on the Basic plan.
Create a space
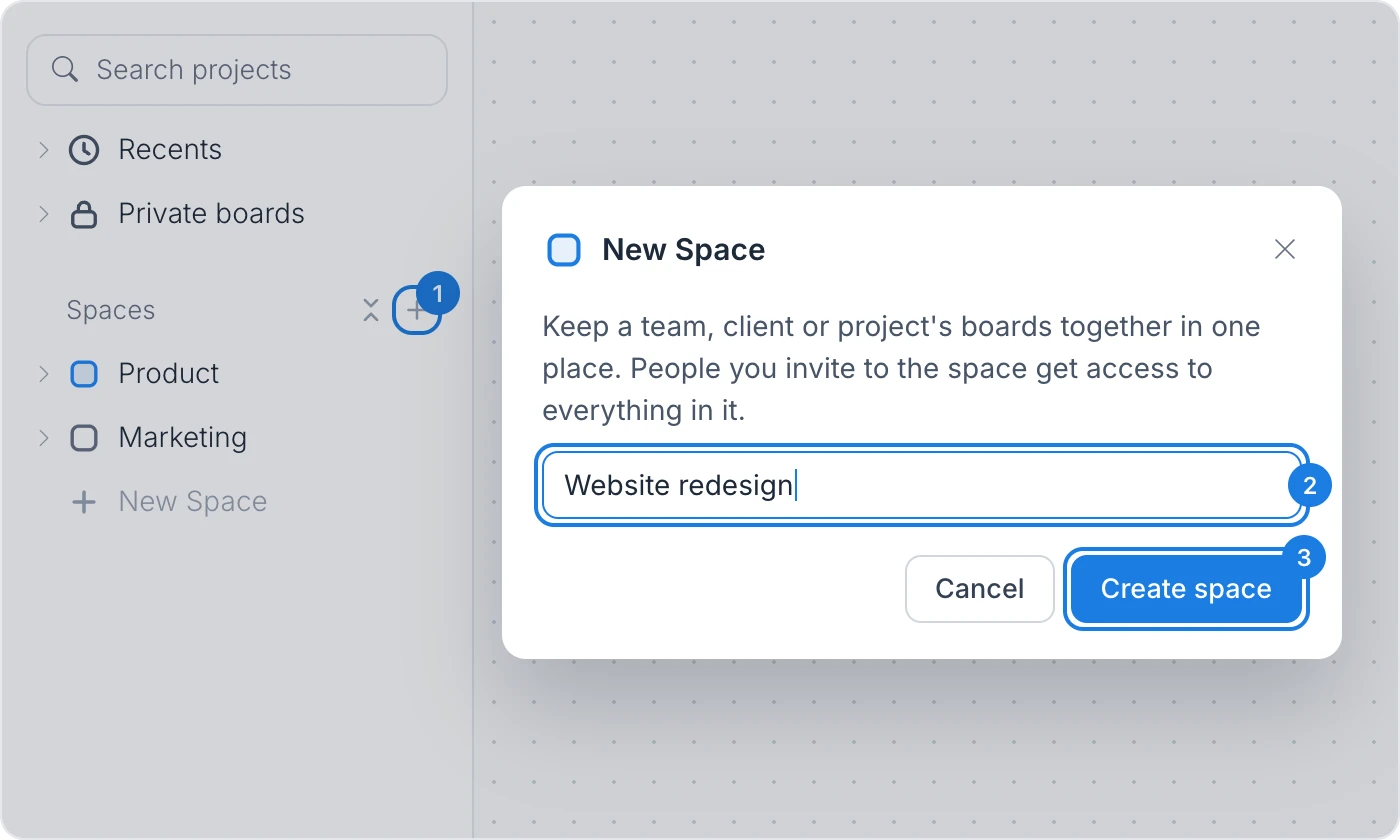
In the workspace sidebar, click the + button beside the Spaces label (1), or click New Space at the end of the list.
In the New Space dialog, type a name for the space (2), such as the team, client or project it is for.
Click Create space (3).
The new space appears at the top of your spaces, open and ready for boards. You own the spaces you create.
The Basic plan includes one space of your own in addition to Private boards. Plus and Max include unlimited spaces. See MockFlow pricing for details.
Add boards to a space
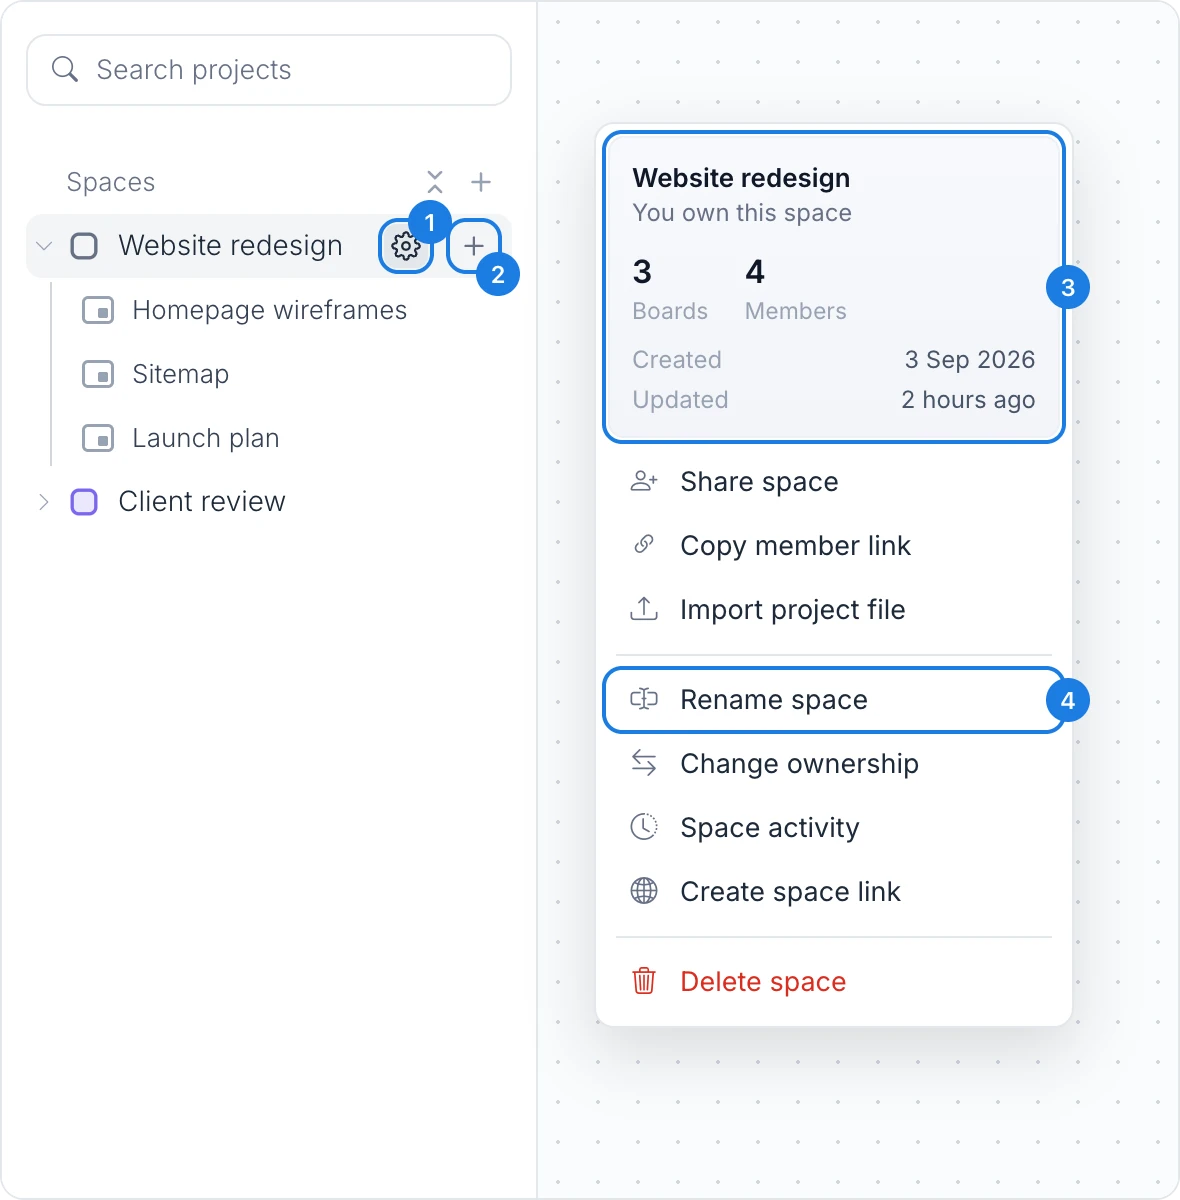
Point to a space in the sidebar and click its + button (2) to create a new board inside it. The button appears for the owner, admins and editors of the space. The board opens with the How do you want to start? panel, as described in Start your first board.
When you click New board at the top of the sidebar while a board in a space is open, the new board is created in that same space.
Rename a space
Point to the space and click its settings button (1).
Choose Rename space (4).
The name becomes editable in the sidebar. Type the new name and press Enter to save, or Esc to keep the old one.
Only the owner and admins of a space can rename it. The new name shows for everyone in the space.
See a space's details
The settings menu opens with a summary of the space (3): your role in it, how many boards and members it has, and when it was created and last updated. Below the summary are the actions for the space, such as Share space, Copy member link, Space activity and Create space link. Which actions you see depends on your role in the space.
Arrange spaces and boards

Reorder spaces: drag a space up or down in the Spaces list. A blue line shows where it will drop. The order is your own and does not change the sidebar for anyone else.
Reorder boards: drag a board up or down inside its space. Editors, admins and the owner can reorder boards, and the new order shows for everyone in the space.
Collapse all spaces: click the collapse button beside the Spaces label to close every open space at once. Click it again to reopen them.
Your role in a space
Spaces that others share with you show your role in two ways: a line inside the open space, such as You are an editor, and the color of the space icon.
Role | What you can do in the space |
|---|---|
Reviewer | View boards in real time, add feedback and export |
Editor | Everything a reviewer can do, plus edit boards in real time |
Admin | Full rights, including renaming and sharing the space |
The owner has every right an admin has, and can also change ownership and delete the space.