
Sections: group and organize items
Use sections to group items on a MockFlow board, move them together, line them up with stacking and give each group its own theme.
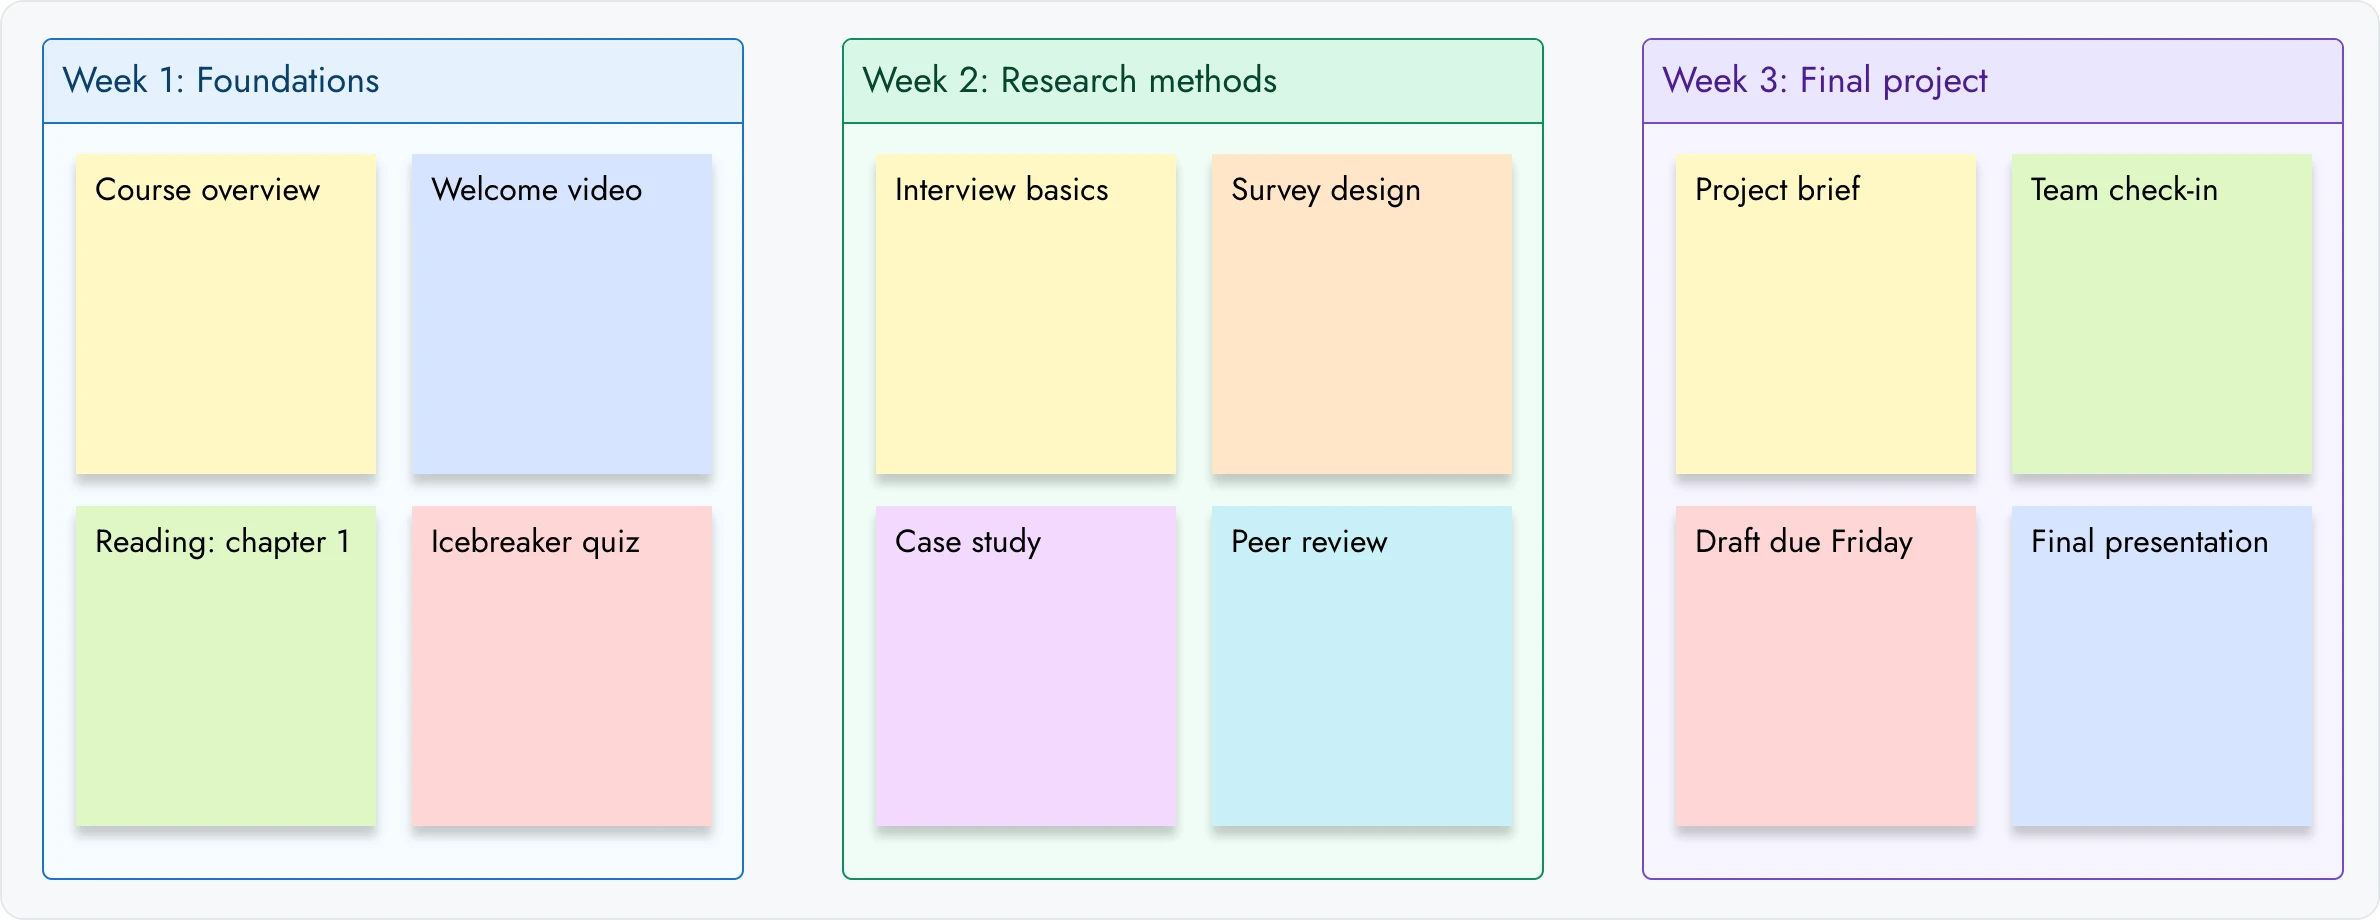
A section is a titled area on the board that holds the items placed inside it. Use sections to give a board structure: one section for each week of a course, each stage of a customer journey, each column of a retrospective or each channel of a campaign. When you move a section, everything inside it moves too.
What a section is
A section is a container with a title bar. It holds any item you place completely inside it: sticky notes, text, images, components and even other sections.
Items move with it: drag the section and its contents come along, keeping their places.
It has a title: name each section after the group it holds, such as Week 1, Ideas or Next steps.
It can arrange its contents: with stacking turned on, the section lines up its items in a row or a column for you.
It has its own look: themes, layouts, icons and borders tell groups apart at a glance.
Add a section to your board
The quickest way to add a section is the Stationery menu in the tool bar.
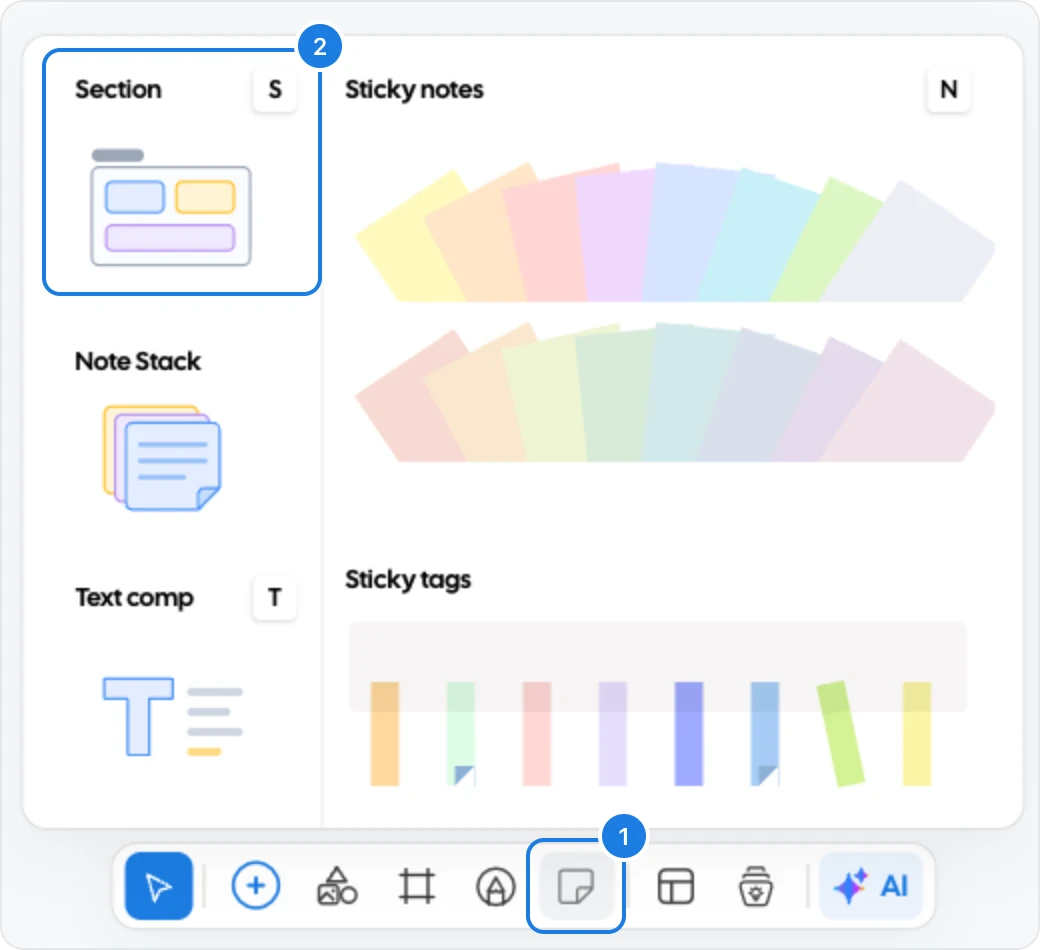
Click Stationery (1) in the tool bar, or press Ctrl+6 (⌘+6 on Mac).
Click Section (2). The section appears in the middle of your view. You can also press S on the canvas.
Double-click the title and type a name for the section.
Drag the edges of the section to make it the size you need.
There are two more ways to add one:
From Frames: click Frames in the tool bar and choose Section under Brainstorm frames.
Around items already on the board: select the items, then right-click and choose Wrap in Section, or click Wrap inside section in the toolbar above them. MockFlow draws a section around the selected items and places it behind them, so they belong to it straight away.

To group items that are already on the board, use Wrap in Section instead of drawing a new section over them. A new section added on top of existing items would cover them.
Put items in a section and move them together

An item belongs to a section when it sits completely inside the section's edges. Drag a sticky note, an image or any other item into the section to add it. Drag it out to take it out of the group.
When you drag the section by its title bar, every item inside moves with it. Items outside the section stay where they are.
To add a new item straight into a section, select the section and click Add inside section (2 in the toolbar below). Choose a Sticky note, Sticky tag, Text, Image or Note stack, and it is placed inside the section.
The section toolbar
Click a section's title bar to select it. A toolbar appears with every section option.
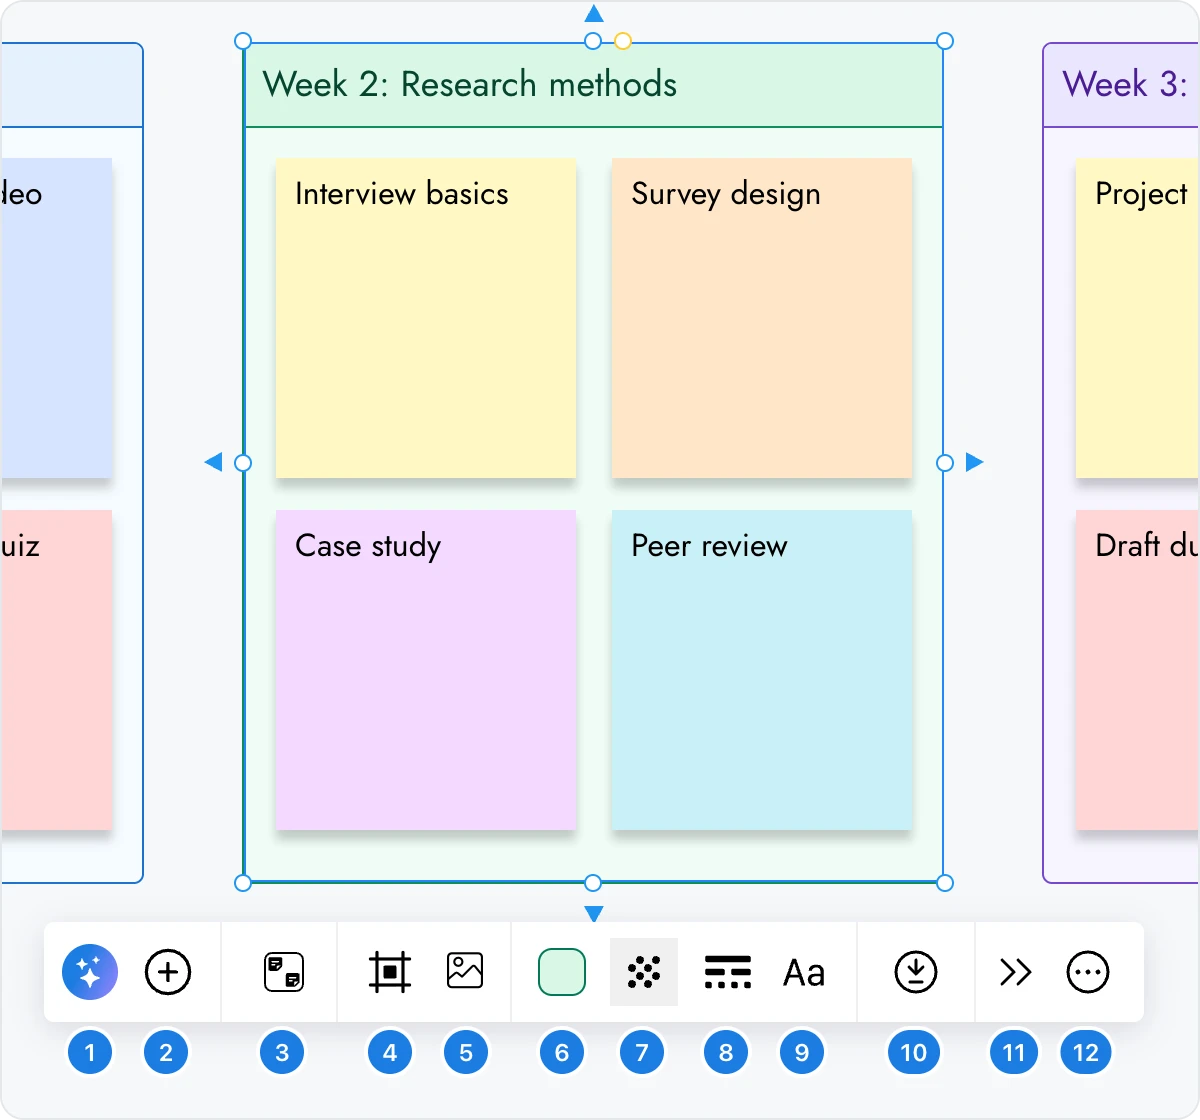
Generate with AI: fill the section with sticky notes from a prompt.
Add inside section: add a sticky note, sticky tag, text, image or note stack inside the section.
Section component stacking: line up the items inside in a row or a column.
Layout style: choose how the section is drawn.
Set Icon: show an icon beside the title.
Theme: a color theme for the title bar, background and border.
Toggle background: show or hide the section's background.
Border: the border style, color, corner radius and opacity.
Text: the font and color of the title.
Export Section: save the section and everything in it as an image.
Toggle advanced settings: more options, such as locking the section.
Section edit menu: copy, paste, layer order and delete options for the section on its own.
Line up items automatically with stacking

Stacking keeps the items in a section in a neat row or column. Each time you drop an item into a stacked section, it slides into line next to the others. Stacking suits agendas, reading lists, ranked ideas and any group whose items should stay evenly spaced.
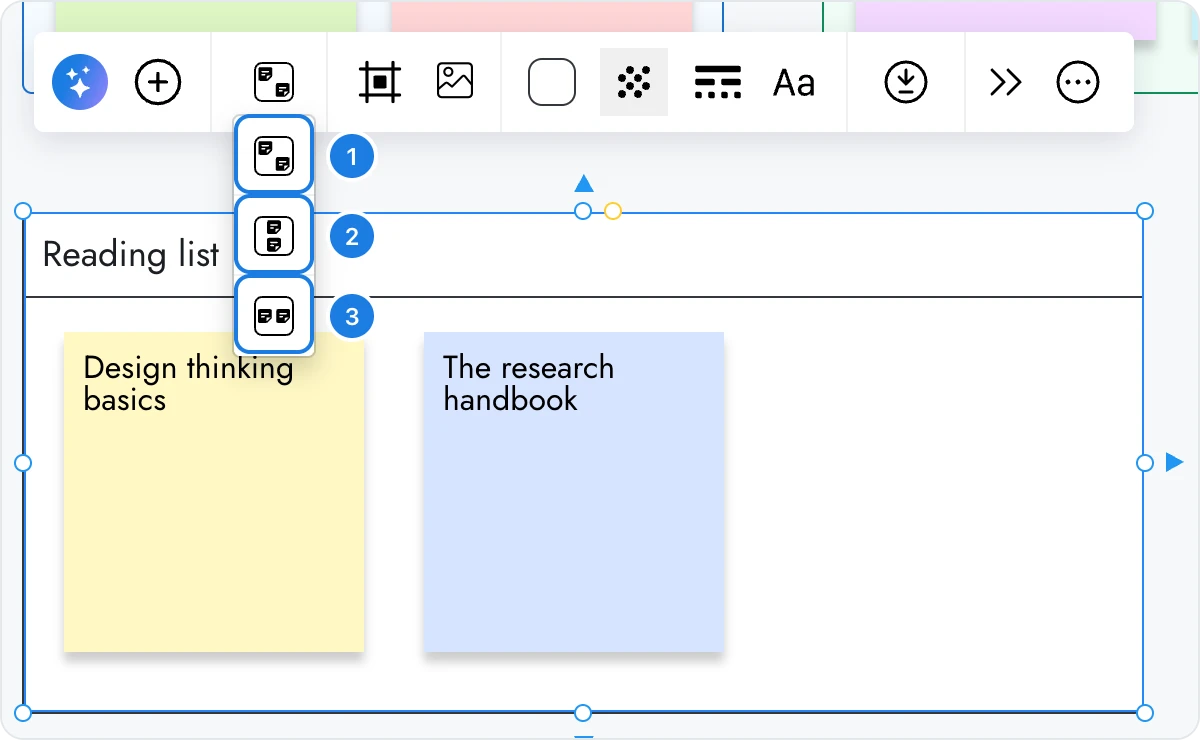
Select the section and click Section component stacking (3 in the toolbar).
Choose No stacking (1), Vertical stacking (2) for a column, or Horizontal stacking (3) for a row.
To change the space between items, type a number in Stack gap, the field that appears beside the stacking button.
Change how a section looks
A theme colors the title bar, background and border of a section together, so groups stay easy to tell apart.
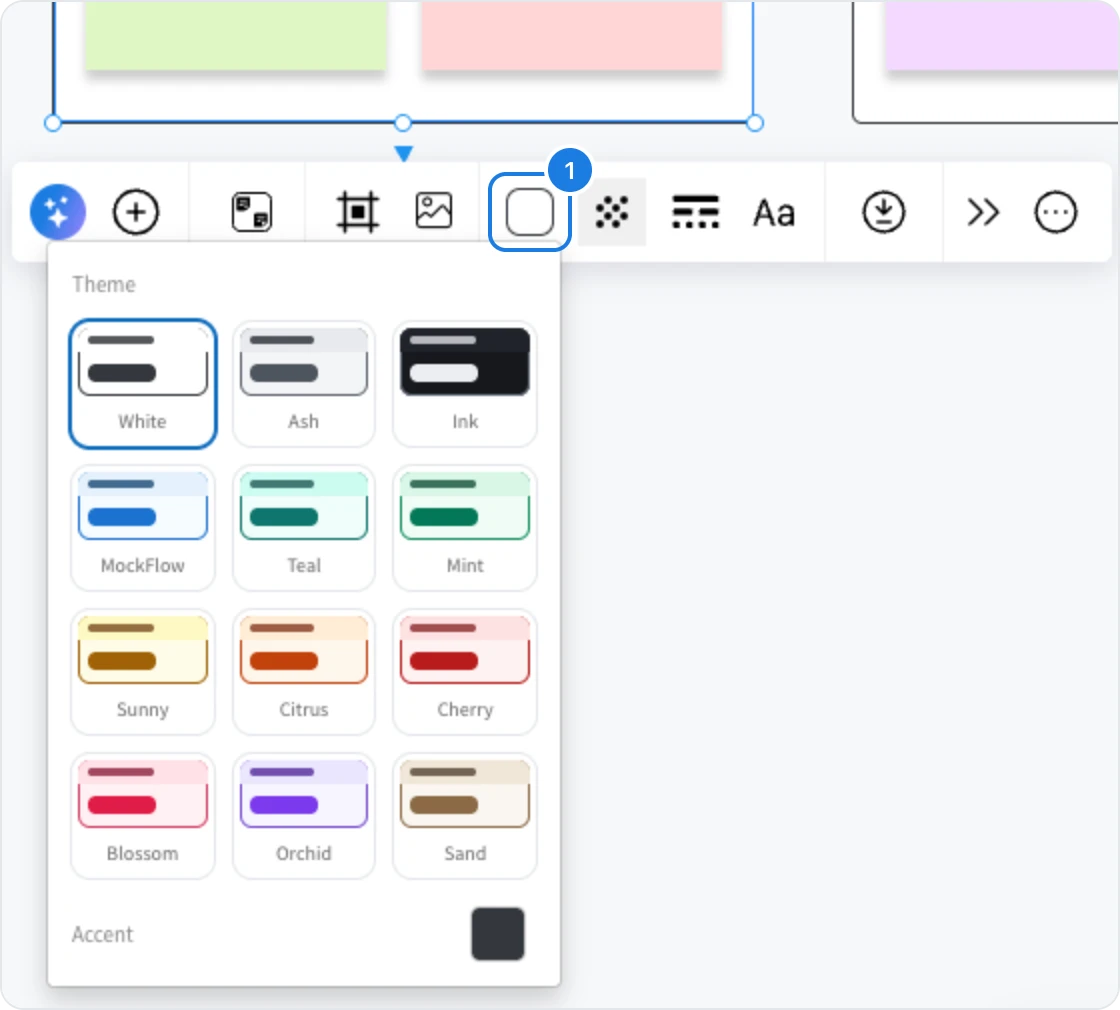
Select the section and click Theme (1).
Pick a theme, such as MockFlow, Mint or Orchid.
To fine tune it, choose a color under Accent.
Layout style (4 in the toolbar) changes how the section is drawn. Each layout keeps the colors of the theme you picked:

Layout | How the section looks |
|---|---|
Default | A card with a colored title bar and a border |
Minimal | The title stands on the canvas above a plain block of color |
Tab | The title sits in a colored tab above the outlined section |
Appear | A soft block of color with the title inside it and no title bar |
You can also add an icon beside the title with Set Icon (5), hide the background with Toggle background (7), and set the border and title font with Border (8) and Text (9).
Fill a section with sticky notes using AI
A section can write its own content. Describe what you need, and AI adds sticky notes inside the section, which grows to fit them.
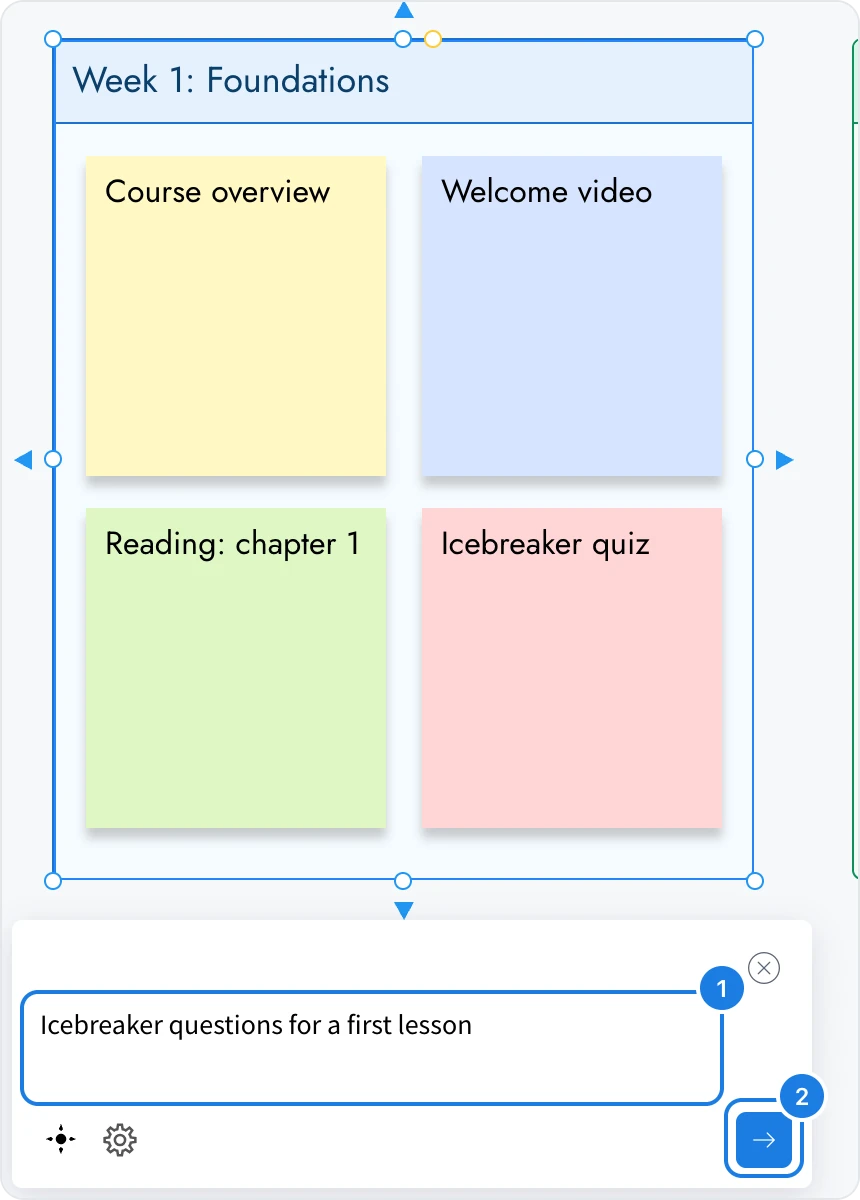
Select the section and click Generate with AI (1 in the toolbar). A prompt box opens in place of the toolbar.
Type what the notes should cover in Prompt to generate sticky notes (1), for example icebreaker questions for a first lesson or risks for the product launch.
Click Generate (2). The new sticky notes appear inside the section, ready to edit and move.
Export a section as an image
Click Export Section (10 in the toolbar) to save the section and everything inside it as an image. Use it to share one part of a board, such as a single week of a plan or one stage of a journey, in a document, a slide or a message.
Delete a section but keep its contents
Deleting a section with the Delete key also deletes every item inside it. To remove only the section, use Delete Section Only.
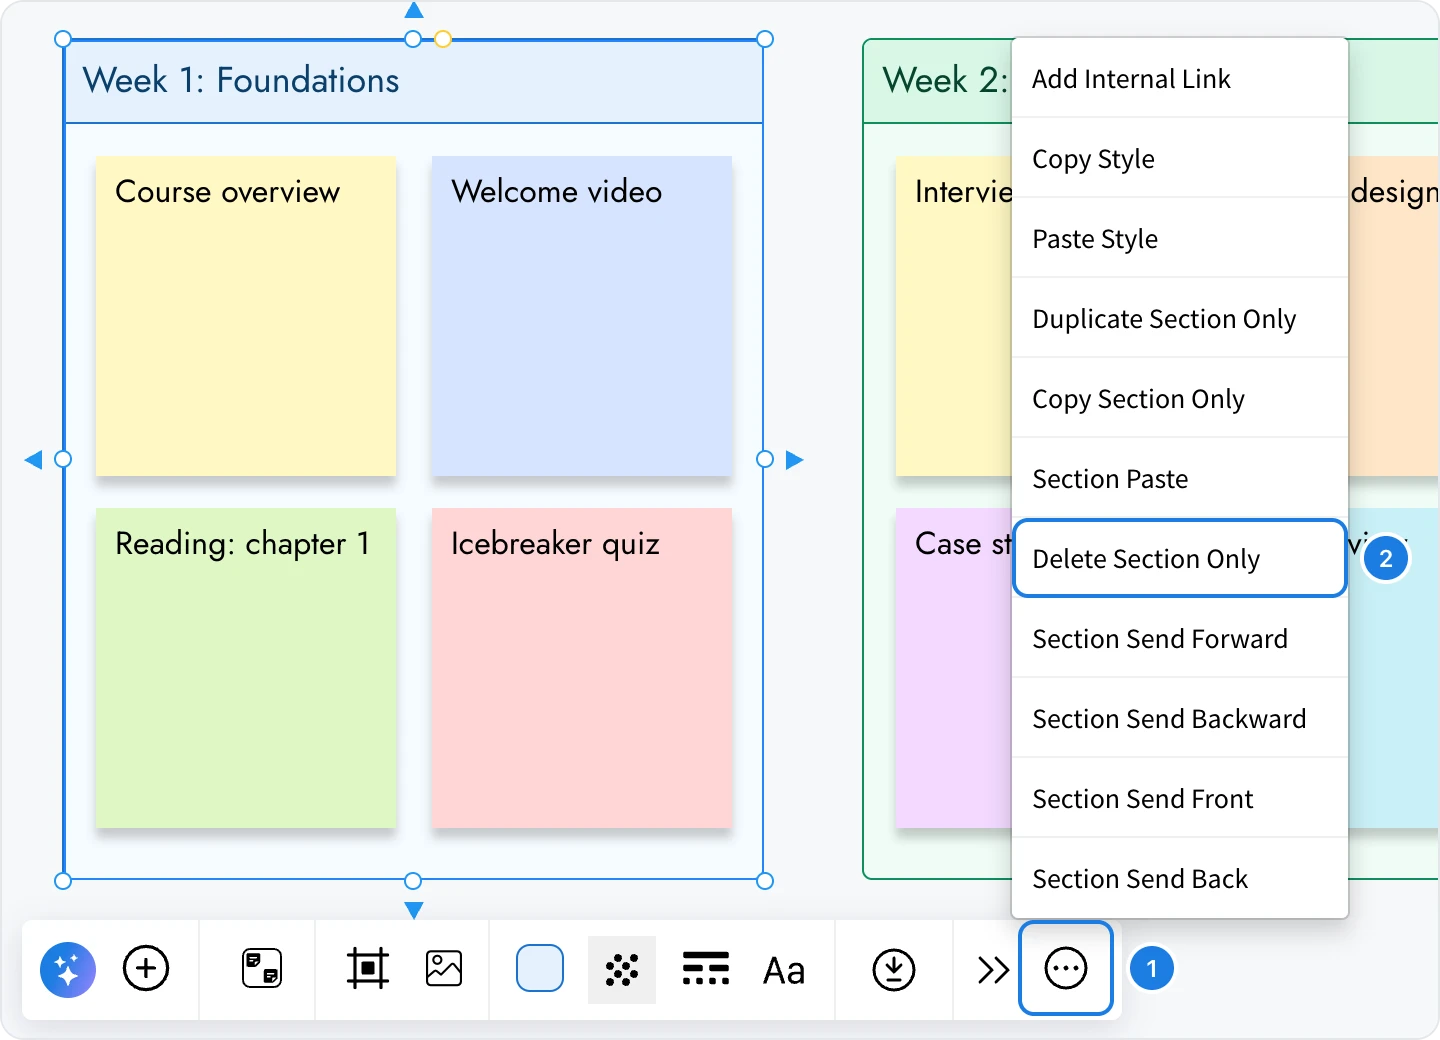
Select the section.
Click Section edit menu (1), the last button in the toolbar.
Choose Delete Section Only (2). The section is removed and its items stay on the board where they were.
You can also use the keyboard:
Select the section and press Ctrl Backspace to delete the section and keep its contents.
Select the section and press ⌘ Backspace to delete the section and keep its contents.
The Section edit menu has more options that act on the section without its contents:
Duplicate Section Only, Copy Section Only and Section Paste: reuse an empty copy of the section, with its size and style.
Copy Style and Paste Style: give another section the same look.
Section Send Forward, Section Send Backward, Section Send Front and Section Send Back: change which sections sit on top when they overlap.
Add Internal Link: turn the section into a link that takes people to another item on the board.
Sections and frames
Sections are also listed in the Frames menu, because both hold other items. The difference is purpose: a section is a general container for any group, while each frame is a ready area for one kind of work.
Section | Frame | |
|---|---|---|
Made for | Grouping any items | One kind of work, such as a diagram, a wireframe, a moodboard or a floor plan |
Holds | Any items placed inside it | The content of its kind of work |
Arranges items | Optional stacking in a row or a column | In its own way, depending on the frame |
AI | Generates sticky notes | Generates content of its kind, such as a diagram or a design |
Best for | Weeks, stages, columns, themes and topics | Building a specific diagram, screen, design or plan |
Use sections to organize a board, and frames to build a specific piece of work inside it. A section can hold frames too, so one section can gather the diagram, the notes and the images for one topic.