
Sales Process Flow Diagram: Stages, Example, and How to Create One
Sales teams often know their pipeline stages, yet the actual path from first contact to closed deal can still feel inconsistent. Handoffs get missed. CRM updates happen late. Different reps follow different steps, which makes forecasting and onboarding harder than they need to be.
A sales process flow diagram gives teams a clearer way to see how work moves across the deal lifecycle. In this guide, we’ll look at the stages that belong in the flow, walk through a practical example, and show how to build a reusable diagram in MockFlow IdeaBoard.
What is a sales process flow diagram?
A sales process flow diagram is a visual representation of how a lead moves through each stage of the sales cycle. It shows the sequence of actions, decision points, handoffs, and outcomes that shape the full sales process workflow.
Teams may also call it a sales process flowchart, sales workflow diagram, or sales process diagram. The strongest versions show both the visible sales pipeline and the operational steps behind it, including CRM updates, ownership changes, approvals, and nurture paths.
Sales process flow diagram vs Sales process map
Term | Main focus |
Sales process flow diagram | Shows the sequence of sales steps, decision branches, and how leads move from one stage to the next |
Sales process map | Adds broader process context, including owners, inputs, outputs, responsibilities, and supporting activities |
The terms are often used interchangeably. In practice, a sales process map usually includes more operational context, while a flowchart for the sales process focuses more closely on what happens next.
Also read → How to create a process map: Step by step guide
Key elements of a sales process flow diagram
A useful sales process chart should include:
- A clear start point, such as lead capture
- Sales stages in the correct order
- Decision points, such as whether a lead is qualified
- Connectors that show the direction of the workflow
- Owners or teams responsible for each step
- CRM actions and required updates
- Final outcomes, including won, lost, or nurture
These elements make the diagram useful for sales operations, process documentation, and day-to-day execution.
Why should teams use a sales process flow diagram?
A sales process flow diagram helps everyone follow the same path from lead capture to customer handoff. When each stage, decision, and responsibility is documented, teams spend less time guessing and more time moving deals forward.
Key benefits include:
- Standardize the sales process: Give every sales representative a consistent workflow to follow.
- Identify bottlenecks: Spot delays, unnecessary approvals, or repeated handoffs that slow the sales cycle.
- Clarify ownership: Define who is responsible for each stage, reducing confusion between sales, marketing, and customer success.
- Improve onboarding: Help new team members understand the sales process faster with a visual guide.
- Keep CRM data consistent: Align CRM updates with each stage so reporting and forecasting stay accurate.
- Strengthen cross-functional collaboration: Create a shared view of the workflow that keeps every team aligned throughout the deal lifecycle.
The best results come from mapping your current sales process first. Once the real workflow is visible, it becomes much easier to simplify, automate, and improve it over time.
DataIntelo estimates that the global diagram software market was valued at $3.8 billion in 2025 and is projected to reach $9.2 billion by 2034, reflecting continued demand for tools that help teams visualize processes, systems, and ideas.
What are the stages of a sales process flow diagram?
Most sales process flow diagrams follow the same core path, though the exact stages depend on the sales model, deal complexity, and CRM setup.
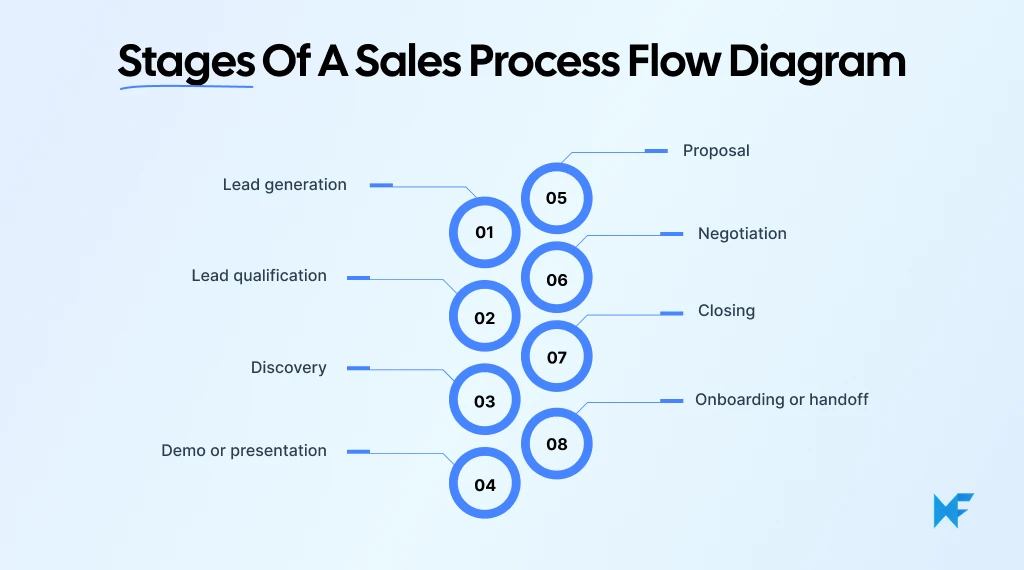
Stage | Purpose | Key action | Exit criteria |
Lead generation | Create new opportunities | Capture inbound or outbound leads | Lead enters the CRM |
Lead qualification | Assess fit and intent | Review need, budget, authority, and timing | Qualified opportunity or nurture |
Discovery | Understand the buyer’s situation | Confirm goals, pain points, and requirements | Clear problem and next step |
Demo or presentation | Show relevant value | Tailor the solution to the buyer’s needs | Buyer interest is confirmed |
Proposal | Formalize the offer | Share scope, pricing, and terms | Proposal is reviewed |
Negotiation | Resolve objections and terms | Finalize commercial details | Verbal or written agreement |
Closing | Complete the deal | Secure approval and signature | Won or lost |
Onboarding or handoff | Transfer the customer smoothly | Share context with delivery or customer success | Ownership is accepted |
The value comes from defining clear exit criteria. This keeps opportunities from moving forward before the required actions are complete.
Sales process flow diagram example
Let's take a simple B2B SaaS sales process as an example. A prospect downloads an ebook and enters the CRM as a new lead. The sales team qualifies the lead before moving it to a discovery call. If there's a good fit, the account executive schedules a product demo, shares a proposal, negotiates terms, and closes the deal. The customer is then handed over to the onboarding team.
The workflow looks like this:
Lead captured → Qualified? → Yes → Discovery → Demo → Proposal → Proposal approved? → Yes → Negotiation → Deal won → Customer onboarding
If the answer to either decision point is No, the lead doesn't have to be discarded. It can move into a nurture workflow for future follow-up until it's ready to re-enter the sales pipeline.
The sales process flowchart template below follows a similar structure and can be customized with your own stages, approval rules, CRM actions, and team responsibilities.
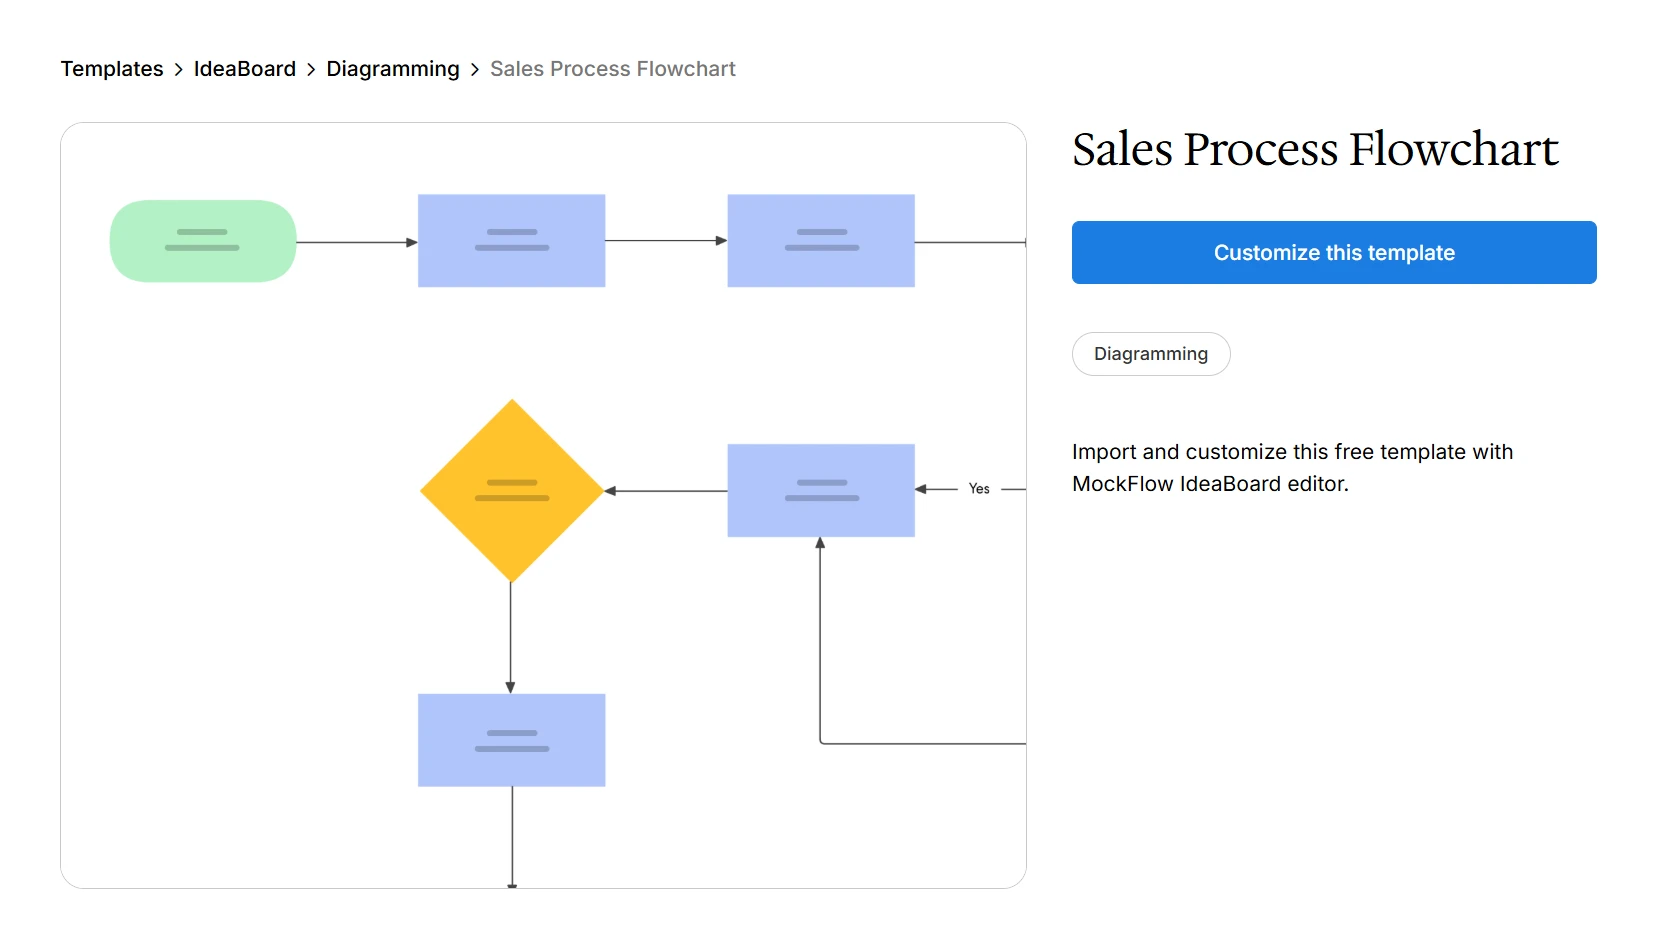
Customize this sales process flowchart template on IdeaBoard
How to create a sales process flow diagram in MockFlow IdeaBoard?
A useful sales process flow diagram should reflect how deals actually move through your business. The goal is to capture the current workflow clearly, then improve it with the people who use it every day.
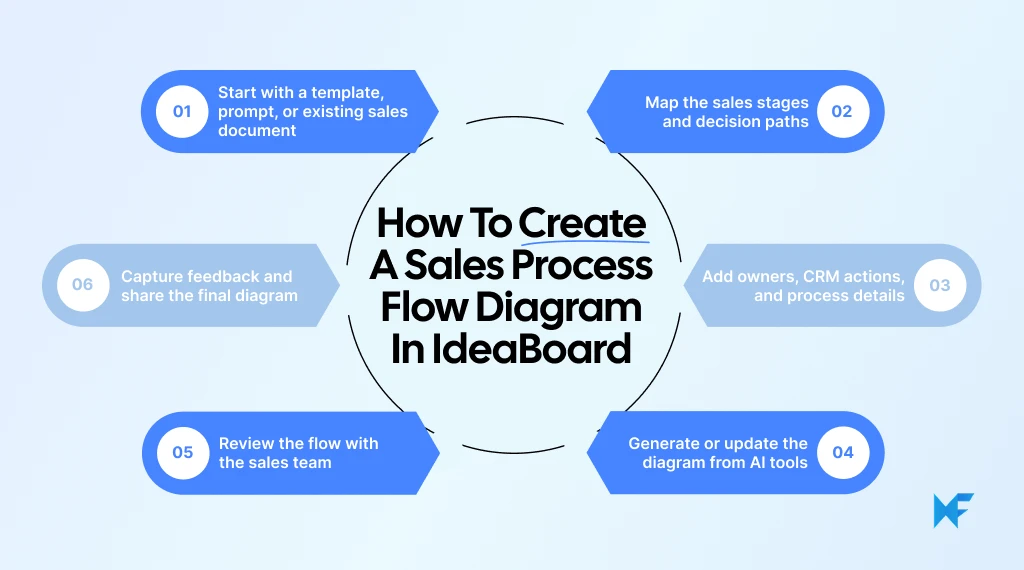
1. Start with a template, prompt, or existing sales document
Begin by choosing the fastest starting point for your team. You can open a blank canvas, use a customizable IdeaBoard template, or work from an existing sales document.
If your process already exists in a document, prompt, or image, Mida AI can turn that source into a structured visual board. This gives you an initial layout that you can review instead of building every stage manually.
Teams that create similar diagrams regularly can also place an AI Prompt Box on the canvas. Add your instructions once, such as the stages, decision points, and output format you expect, so collaborators can generate a consistent starting structure.
2. Map the sales stages and decision paths
Add the sales stages in the order they happen today. Start with lead capture and continue through qualification, discovery, proposal, closing, and onboarding.
Use standard flowchart shapes to distinguish actions from decisions. For example:
Lead captured → Is the lead qualified? → Discovery → Proposal → Was it approved? → Closing → Won or lost
Add separate paths for leads that need nurturing, deals that require additional approval, and opportunities that return to an earlier stage.
Map the current process before designing a better one. This helps the team see where delays, duplicate steps, and informal workarounds already exist.
Quick tip → If the workflow becomes difficult to follow, keep the main diagram focused on the most common end-to-end path. Move complex exceptions, alternate entry points, and detailed routing rules into separate subprocess diagrams. This layered approach to complex process flows makes the sales process easier to review without removing important operational detail.
3. Add owners, CRM actions, and process details
Label every stage with the person or team responsible for moving it forward. This may include an SDR, account executive, sales manager, legal team, or customer success manager.
Then add the information needed to complete each step:
- Entry and exit criteria
- Required CRM updates
- Automation triggers
- Approval requirements
- Handoff details
Use swimlanes when several teams contribute to the same deal lifecycle. This makes ownership visible and helps prevent leads from stalling between departments.
Keep supporting details close to the relevant stage. The diagram should be easy to use during onboarding, pipeline reviews, and process discussions without requiring a separate explanation.
4. Generate or update the diagram from AI tools
If your team already documents workflows inside ChatGPT, Claude, Cursor, or another compatible assistant, you can create or revise the diagram from that workspace.
The IdeaBoard MCP integration lets teams request structured visuals without manually recreating the information on a new board. For recurring workflows, agent skills can provide reusable instructions for generating diagrams in a consistent format.
These options are most useful when the sales process already exists as meeting notes, CRM documentation, or an AI conversation. Review the generated flow carefully before treating it as final, since the diagram still needs to reflect the team’s real operating process.
5. Review the flow with the sales team
Bring sales, marketing, sales operations, and customer success into the review. Ask each group to check the stages they own, the information they receive, and the exceptions they handle.
Gallup reports that 52% of remote-capable U.S. employees work in a hybrid model, so sales process documentation needs to remain understandable and accessible even when stakeholders are not reviewing it in the same room.
Review the diagram one path at a time. Confirm:
- Whether the sequence matches actual practice
- Whether each decision has a clear outcome
- Whether ownership changes are visible
- Whether nurture, rejection, and re-entry paths are included
Those working inside different workspaces like Teams or Trello can also use IdeaBoard within channels and meetings so the review stays connected to the discussion.
6. Capture feedback and share the final diagram
Use comments to record questions or explain rules that cannot fit neatly inside a flowchart shape. Text comments work well for quick edits, while voice and video comments can provide more context around disputed handoffs or approval decisions.
Once the workflow is agreed, share the IdeaBoard with the relevant team members and make it accessible where sales documentation is normally stored.
Treat the final sales process diagram as a living document. Update it whenever CRM rules change, new approval steps are introduced, or ownership moves between teams. A diagram stays valuable only when it continues to match the process people are expected to follow.
See how a process flow takes shape in MockFlow IdeaBoard with this short walkthrough.
Build Your Sales Process Flow Diagram Today
Stop relying on scattered notes and inconsistent sales steps. Turn your current workflow into a clear, usable diagram your team can follow.
Sign up for MockFlow IdeaBoard to map your sales stages, review handoffs, and keep the process updated as your pipeline evolves.
Need to start immediately? Open the online whiteboard and build your first sales process flow in the browser.
FAQs
1. How often should we update a sales process flow diagram?
Review the diagram quarterly and whenever your CRM, sales stages, approval rules, or team responsibilities change. Update it sooner when representatives begin using workarounds, since this usually signals that the documented process no longer reflects the real workflow.
2. What is the difference between a sales pipeline and a sales process flowchart?
A sales pipeline shows where active opportunities currently sit. A sales process flowchart shows the actions, decisions, and handoffs required to move those opportunities forward. One supports pipeline tracking, while the other documents how the work should happen.
3. Which flowchart symbols should we use for a sales process?
Use ovals for start and end points, rectangles for actions, diamonds for decisions, and arrows for direction. Keep the symbol set simple so sales representatives can understand the workflow quickly without needing a separate legend.
4. How do we align a sales process diagram with our CRM?
Match each diagram stage to an actual CRM opportunity stage. Then document required fields, automation triggers, ownership changes, and exit criteria beside the relevant step. This helps the diagram support daily CRM use rather than becoming separate documentation.
5. Which sales process steps should we automate?
Start with repetitive, rules-based tasks such as lead assignment, follow-up reminders, CRM field updates, approval notifications, and nurture enrollment. Keep judgment-heavy activities, including discovery and negotiation, with the sales team.
6. Who should own the sales process flow diagram?
Sales operations or the sales leader should maintain the diagram, while sales, marketing, and customer success validate the steps they own. Assigning one accountable owner prevents outdated versions and ensures process changes are documented consistently.

How to Run a Team Huddle for Better Team Collaboration
Keeping teams aligned has become harder as projects move faster, priorities shift frequently, and remote collaboration becomes...

Virtual Team Building Games: 14 Ideas for Remote & Hybrid Teams
Introduction Remote teams are now the norm, not the exception. For all the benefits of flexibility and location freedom, remote...

UX Design Tools by Stage: How to Choose the Right Type
TL;DR Choose UX design tools by workflow stage, not popularity. Use whiteboarding tools for ideas and mapping. Use wireframing...
